> ## Documentation Index
> Fetch the complete documentation index at: https://devzone.nayax.com/llms.txt
> Use this file to discover all available pages before exploring further.
# Mechanical Integration
> Mounting guidelines and serial number display requirements for the UNO-mini.
Mounting the UNO-mini correctly ensures reliable contactless card reads and long-term mechanical stability in your enclosure.
## General mounting guidelines
Position the UNO-mini according to the following requirements to ensure reliable NFC field performance.
* Mount the UNO-mini as close as possible to the front panel.
* Mount the UNO-mini as far as possible from metal parts.
## Mounting options
The UNO-mini has one mounting screw hole for an M3 screw with a maximum thread depth of 4 mm.
Using the M3 screw alone is not sufficient for a production installation. Design a plastic bracket that attaches the UNO-mini firmly to the machine body, and use the M3 screw only as a secondary retention point.
Nayax technical support must review and confirm your mechanical mounting design before production. Contact your Nayax integration support team to schedule a design review.
## Nayax serial number
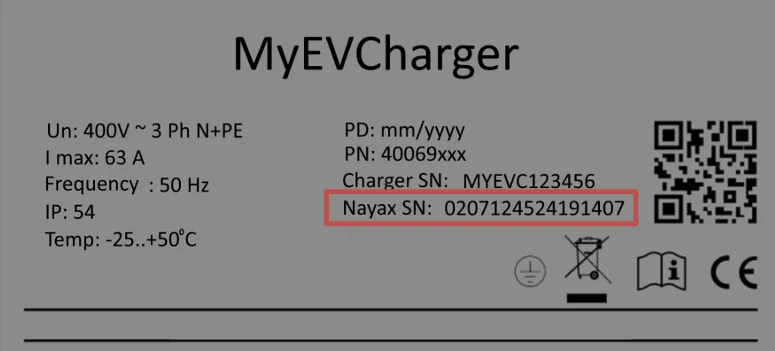
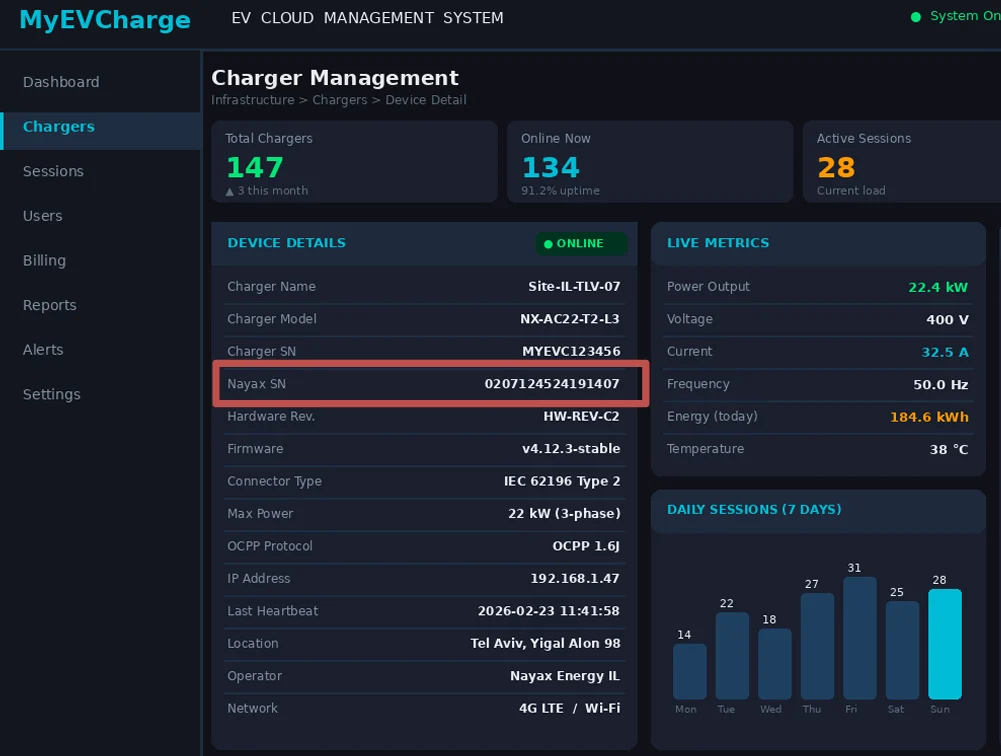
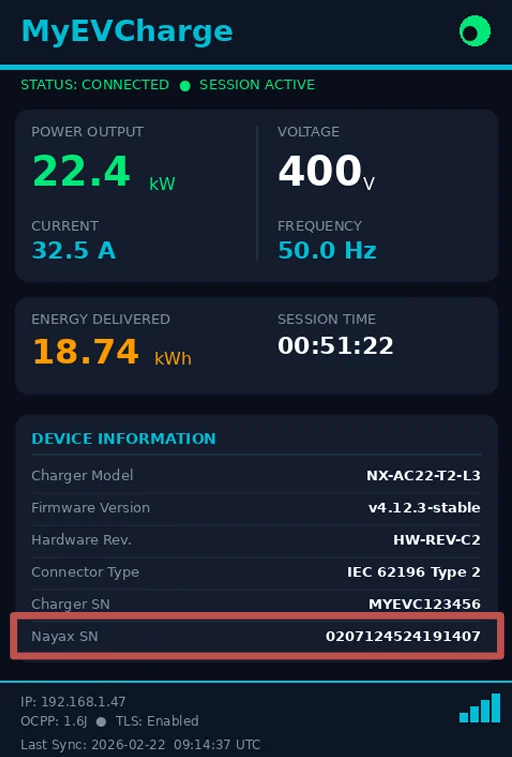
The Nayax device serial number is the only way Nayax support can identify your device in Nayax Core. Display the serial number in all three of the following locations.
1. **Machine label**: Attach a physical label to the machine with the text "Nayax SN:" followed by the serial number.
 2. **OEM backend system**: Create a mapping in your backend between the OEM machine ID and the Nayax serial number.
 3. **Machine display**: If the machine has a display, show the serial number in a device information section.
 ## Next steps
Review EMV logo placement, card scheme brand rules, and LED display requirements.
Understand power requirements and wiring recommendations before connecting the device.
## Next steps
Review EMV logo placement, card scheme brand rules, and LED display requirements.
Understand power requirements and wiring recommendations before connecting the device.