> ## Documentation Index
> Fetch the complete documentation index at: https://devzone.nayax.com/llms.txt
> Use this file to discover all available pages before exploring further.
# Legacy Authentication
Spark uses a two-part security mechanism:
* Token-based identification to associate the request with your account.
* HMAC signature using a shared secret (`Sign Key`) to ensure the request body hasn’t been tampered with in transit.
This page will guide you to securely authenticate Spark API requests using Nayax’s custom HMAC signature mechanism. This involves signing each request body with a shared `Sign Key` and attaching two mandatory headers: `Signature` and `IntegratorId`.
## Prerequisites
Before you begin, make sure you have the following resources:
* A valid Sign Key (shared by Nayax, typically 16 characters)
* The associated Sign Key ID
**Mandatory**
This signature mechanism is required for all Spark endpoints. Requests without a valid signature will be rejected with `401 Unauthorized`.
## Authenticate Requests
Once you have the required resources, you can start authenticating your API requests to Spark by following the steps below:
1. Prepare the JSON body with all the necessary fields (e.g., `TerminalId`, `Cipher`, etc.). Here’s a simplified example for the [StartAuthentication](/reference/spark/transactions/startauthentication) endpoint:
```json theme={null}
{
"TokenId": 116383,
"TerminalId": "0434334921100366",
"TerminalIdType": 1,
"Random": "123456789qwertyui",
"Cipher": "X305dITNTAw2vHsxE+taVcn6UvgBC3fdI6QbqeABgHbo8CKsoZhqISJfslehCiA+L7XYrqvKFci7C6BNj/trzBuNJwBEjgBzKhhgpJ5ggnw="
}
```
2. Serialize the JSON request content, removing whitespace and line breaks. Do not alter values or add escape characters unless they are part of the actual payload.
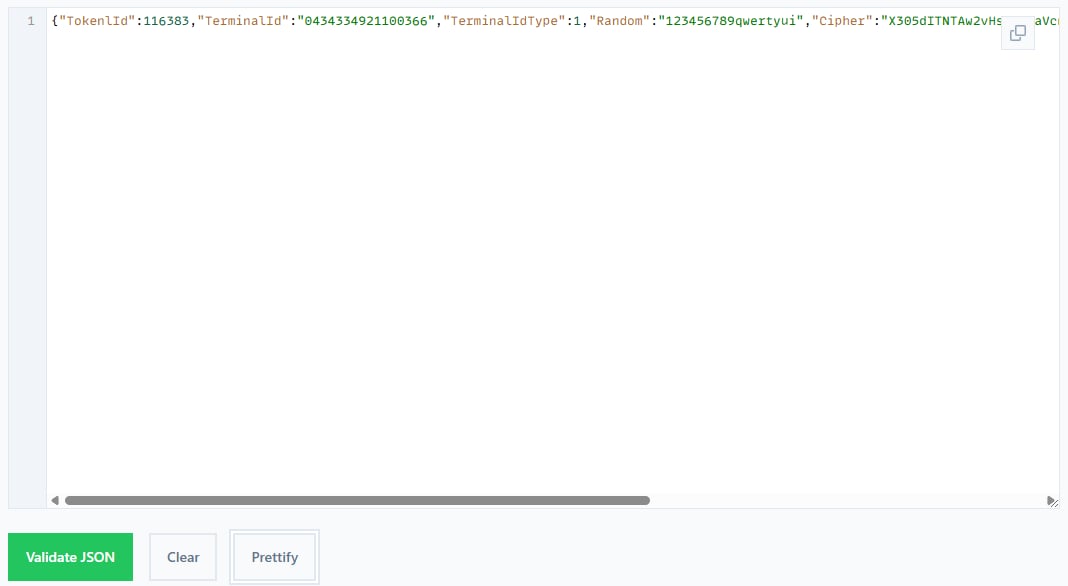 We used this [JSON lint tool](https://jsonlint.com/) to do so in the example. The result is the following.
```json theme={null}
{"TokenId":116383,"TerminalId":"0434334921100366","TerminalIdType":1,"Random":"123456789qwertyui","Cipher":"X305dITNTAw2vHsxE+taVcn6UvgBC3fdI6QbqeABgHbo8CKsoZhqISJfslehCiA+L7XYrqvKFci7C6BNj/trzBuNJwBEjgBzKhhgpJ5ggnw="}
```
3. Generate the `Signature` header following the steps below:
1. Concatenate the serialized request and the Sign Key, separated by ";".
```json theme={null}
{"TokenId":116383,...,"Cipher":"..."};RbtdDsiVNjkAeRty
```
2. Hash the result using SHA-256 (UTF-8 encoded):
We used this [JSON lint tool](https://jsonlint.com/) to do so in the example. The result is the following.
```json theme={null}
{"TokenId":116383,"TerminalId":"0434334921100366","TerminalIdType":1,"Random":"123456789qwertyui","Cipher":"X305dITNTAw2vHsxE+taVcn6UvgBC3fdI6QbqeABgHbo8CKsoZhqISJfslehCiA+L7XYrqvKFci7C6BNj/trzBuNJwBEjgBzKhhgpJ5ggnw="}
```
3. Generate the `Signature` header following the steps below:
1. Concatenate the serialized request and the Sign Key, separated by ";".
```json theme={null}
{"TokenId":116383,...,"Cipher":"..."};RbtdDsiVNjkAeRty
```
2. Hash the result using SHA-256 (UTF-8 encoded):
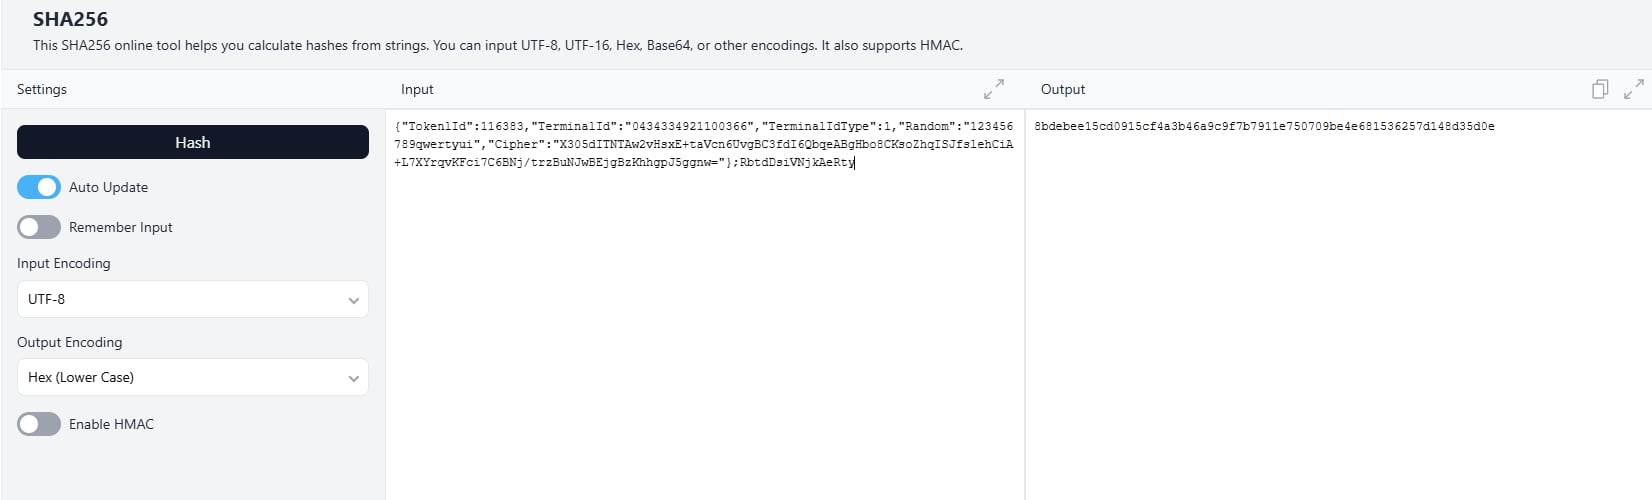 We used [this tool](https://emn178.github.io/online-tools/sha256.html) to do so in the example. Use the output as your `Signature` header.
```json theme={null}
536a5813206bcb663d98715d10a6b2612364245c865cdd5f781ff4428c4a6137
```
4. Add the `IntegratorId` and `Signature` headers to your request.
**Base URL and Domain**
The Spark API base URL is `https://{domain}/api`, where `{domain}` is your Nayax-assigned hostname. Nayax provides a QA domain during sandbox setup and a production domain after certification. Contact your Nayax integration engineer if you have not received your domain.
```json theme={null}
curl -X POST https://{your-domain}/api/StartAuthentication \
--header 'IntegratorId: 927' \
--header 'Signature: 536a5813206bcb663d98715d10a6b2612364245c865cdd5f781ff4428c4a6137' \
--header 'Content-Type: application/json' \
--data '{
"TokenId": 116383,
"TerminalId": "0434334921100366",
"TerminalIdType": 1,
"Random": "123456789qwertyui",
"Cipher": "X305dITNTAw2vHsxE+taVcn6UvgBC3fdI6QbqeABgHbo8CKsoZhqISJfslehCiA+L7XYrqvKFci7C6BNj/trzBuNJwBEjgBzKhhgpJ5ggnw="
}'
```
For this example, the [`/StartAuthentication`](/reference/spark/transactions/startauthentication) method was used, but the process is relevant for any Spark endpoint request and response.
**UTF-8 Encoding**
Ensure the Signature is correctly generated from the minified JSON and UTF-8 hash.
### Build `cipher`
Your ciphertext combines the following:
* A 36-character Spark Transaction ID (a GUID with hyphens).
* A single "=" character.
* A 17-character alphanumeric Random String.
* A 10-character `YYMMDDhhmm` UTC Timestamp.
Follow these steps to generate and encrypt your cipher:
1. Concatenate the Spark Transaction ID, the "=" character, the Random String, and the Timestamp to form the 64-character ciphertext, as in the example below:
```
12c7cec2-c690-4425-9a1f-db0db60e2d8c=123456789qwertyui2306061021
```
2. Extract the 32 rightmost characters from your provided Token to create the 256-bit AES encryption key. For example, suppose the token is the following:
```
some_long_token_wRvTVTkungMIKThTVbj_fiXdfoGclhn0
```
The encryption key is as follows:
```
wRvTVTkungMIKThTVbj_fiXdfoGclhn0
```
3. Encrypt the 64-character ciphertext using AES in ECB mode. Ensure the plaintext is padded (e.g., using PKCS7) to a multiple of 16 bytes. Base64 encode the resulting encrypted bytes for transmission, which yields an output similar to the example below:
```
X305dITNTAw2vHsxE+taVcn6UvgBC3fdI6QbqeABgHbo8CKsoZhqISJfslehCiA+L7XYrqvKFci7C6BNj/trzBuNJwBEjgBzKhhgpJ5ggnw=
```
## See Also
Build and inspect the legacy cipher and `Signature` header in your browser, no code required.
How authentication fits into the full Spark transaction sequence.
We used [this tool](https://emn178.github.io/online-tools/sha256.html) to do so in the example. Use the output as your `Signature` header.
```json theme={null}
536a5813206bcb663d98715d10a6b2612364245c865cdd5f781ff4428c4a6137
```
4. Add the `IntegratorId` and `Signature` headers to your request.
**Base URL and Domain**
The Spark API base URL is `https://{domain}/api`, where `{domain}` is your Nayax-assigned hostname. Nayax provides a QA domain during sandbox setup and a production domain after certification. Contact your Nayax integration engineer if you have not received your domain.
```json theme={null}
curl -X POST https://{your-domain}/api/StartAuthentication \
--header 'IntegratorId: 927' \
--header 'Signature: 536a5813206bcb663d98715d10a6b2612364245c865cdd5f781ff4428c4a6137' \
--header 'Content-Type: application/json' \
--data '{
"TokenId": 116383,
"TerminalId": "0434334921100366",
"TerminalIdType": 1,
"Random": "123456789qwertyui",
"Cipher": "X305dITNTAw2vHsxE+taVcn6UvgBC3fdI6QbqeABgHbo8CKsoZhqISJfslehCiA+L7XYrqvKFci7C6BNj/trzBuNJwBEjgBzKhhgpJ5ggnw="
}'
```
For this example, the [`/StartAuthentication`](/reference/spark/transactions/startauthentication) method was used, but the process is relevant for any Spark endpoint request and response.
**UTF-8 Encoding**
Ensure the Signature is correctly generated from the minified JSON and UTF-8 hash.
### Build `cipher`
Your ciphertext combines the following:
* A 36-character Spark Transaction ID (a GUID with hyphens).
* A single "=" character.
* A 17-character alphanumeric Random String.
* A 10-character `YYMMDDhhmm` UTC Timestamp.
Follow these steps to generate and encrypt your cipher:
1. Concatenate the Spark Transaction ID, the "=" character, the Random String, and the Timestamp to form the 64-character ciphertext, as in the example below:
```
12c7cec2-c690-4425-9a1f-db0db60e2d8c=123456789qwertyui2306061021
```
2. Extract the 32 rightmost characters from your provided Token to create the 256-bit AES encryption key. For example, suppose the token is the following:
```
some_long_token_wRvTVTkungMIKThTVbj_fiXdfoGclhn0
```
The encryption key is as follows:
```
wRvTVTkungMIKThTVbj_fiXdfoGclhn0
```
3. Encrypt the 64-character ciphertext using AES in ECB mode. Ensure the plaintext is padded (e.g., using PKCS7) to a multiple of 16 bytes. Base64 encode the resulting encrypted bytes for transmission, which yields an output similar to the example below:
```
X305dITNTAw2vHsxE+taVcn6UvgBC3fdI6QbqeABgHbo8CKsoZhqISJfslehCiA+L7XYrqvKFci7C6BNj/trzBuNJwBEjgBzKhhgpJ5ggnw=
```
## See Also
Build and inspect the legacy cipher and `Signature` header in your browser, no code required.
How authentication fits into the full Spark transaction sequence.