> ## Documentation Index
> Fetch the complete documentation index at: https://devzone.nayax.com/llms.txt
> Use this file to discover all available pages before exploring further.
# Create New Queue
Creating an Amazon SQS queue is the first step in setting up your integration with Nayax.
## Select AWS Region
Once the prerequisites are complete, you can proceed to select the AWS region where your queue will be created.
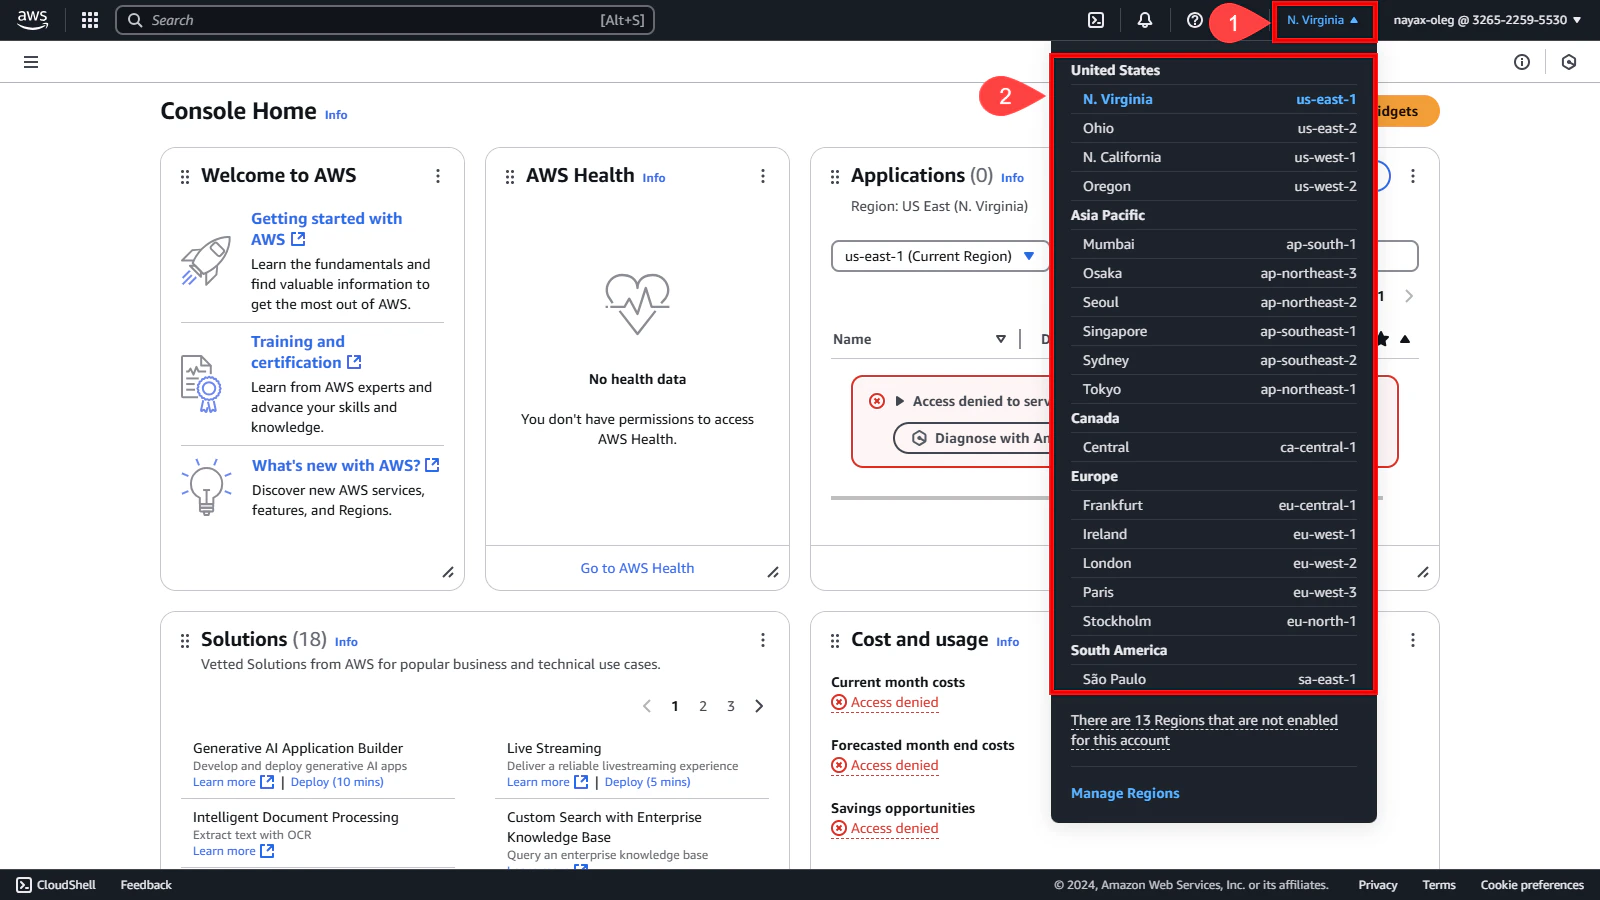
1. Go to the top-right corner of the AWS console.
2. Select the region where you will create the queue.
**Region pricing and latency**
It's important to note that the region you select will affect the pricing and latency.
 ## Create a Queue
Now that you’ve selected a region, the next step is to create a new queue.
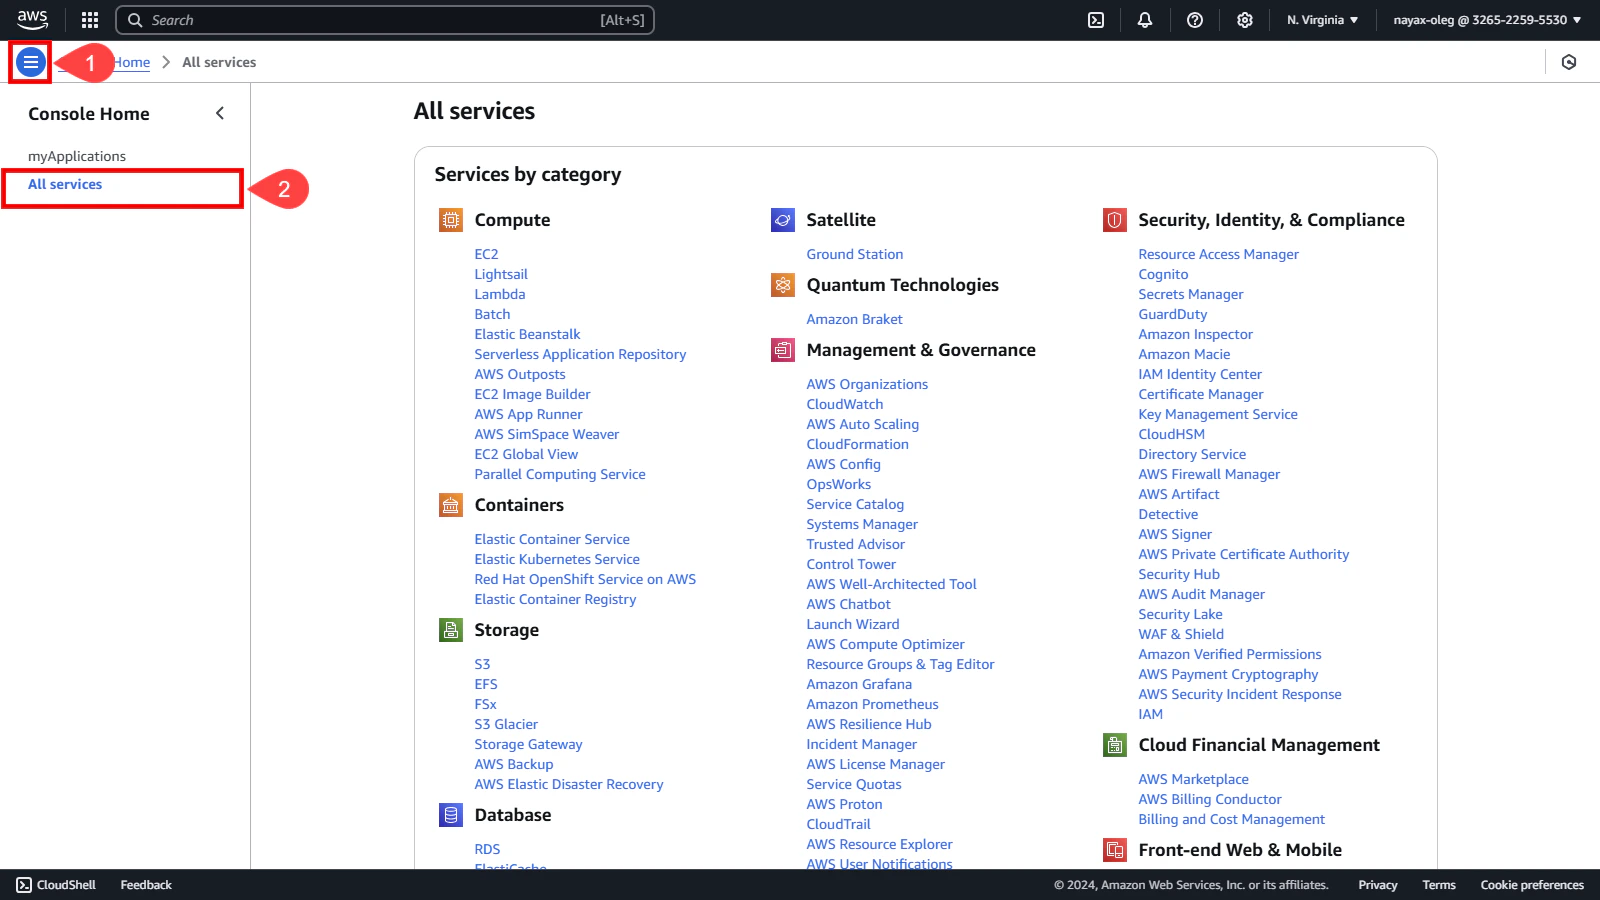
1. Click the **three lines** icon located in the upper left corner of the AWS console.
2. Select the **All services** option.
## Create a Queue
Now that you’ve selected a region, the next step is to create a new queue.
1. Click the **three lines** icon located in the upper left corner of the AWS console.
2. Select the **All services** option.
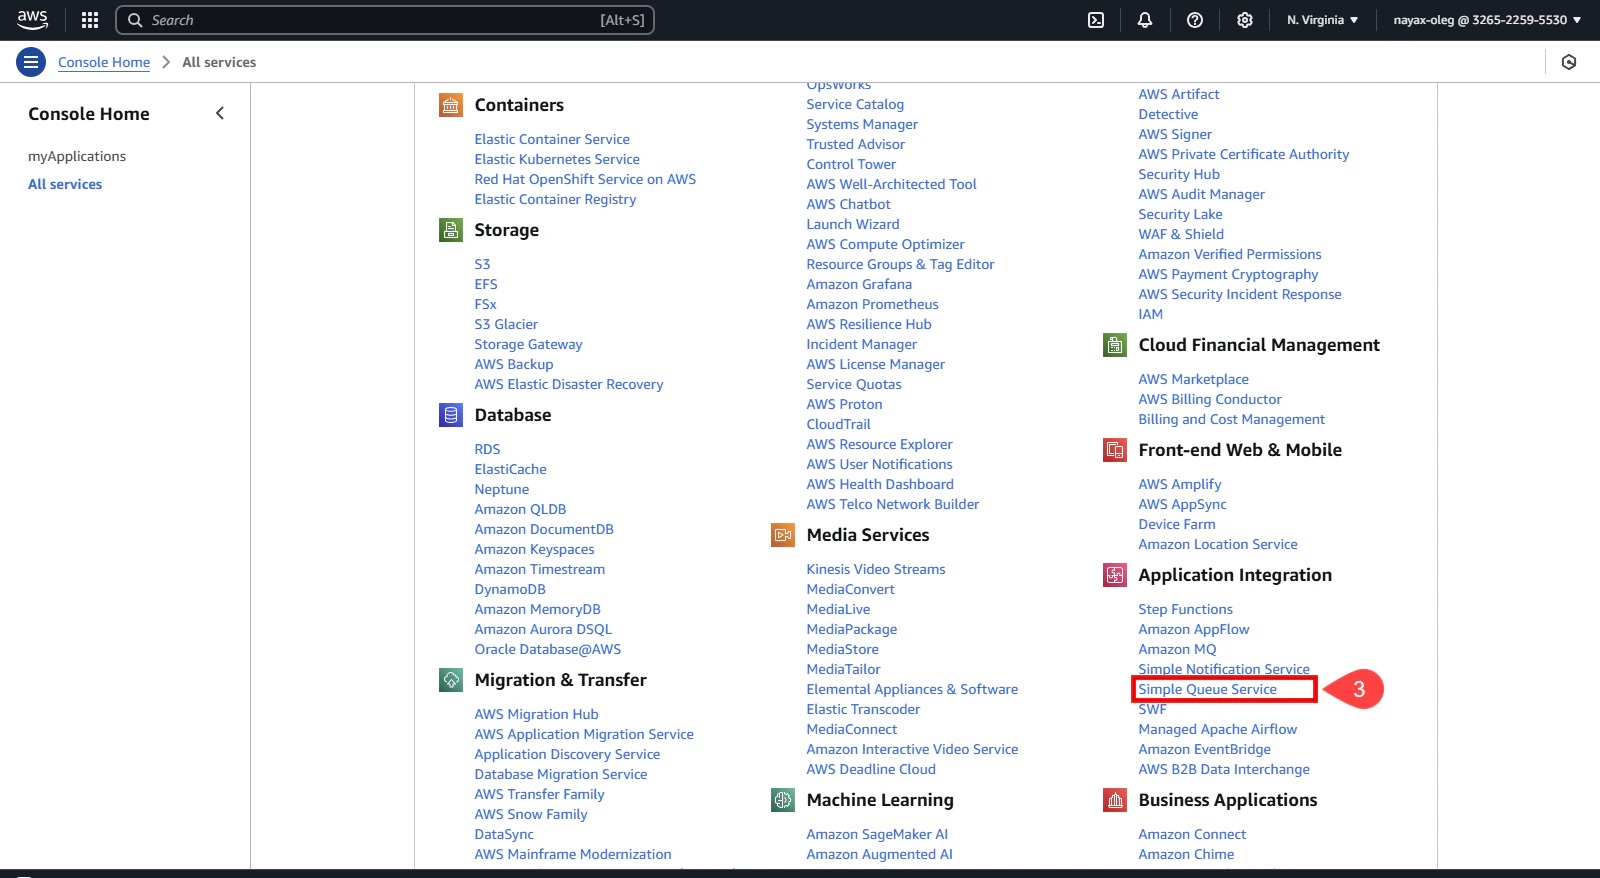
 3. Search the **Application Integration** category and select **Simple Queue Services** (SQS).
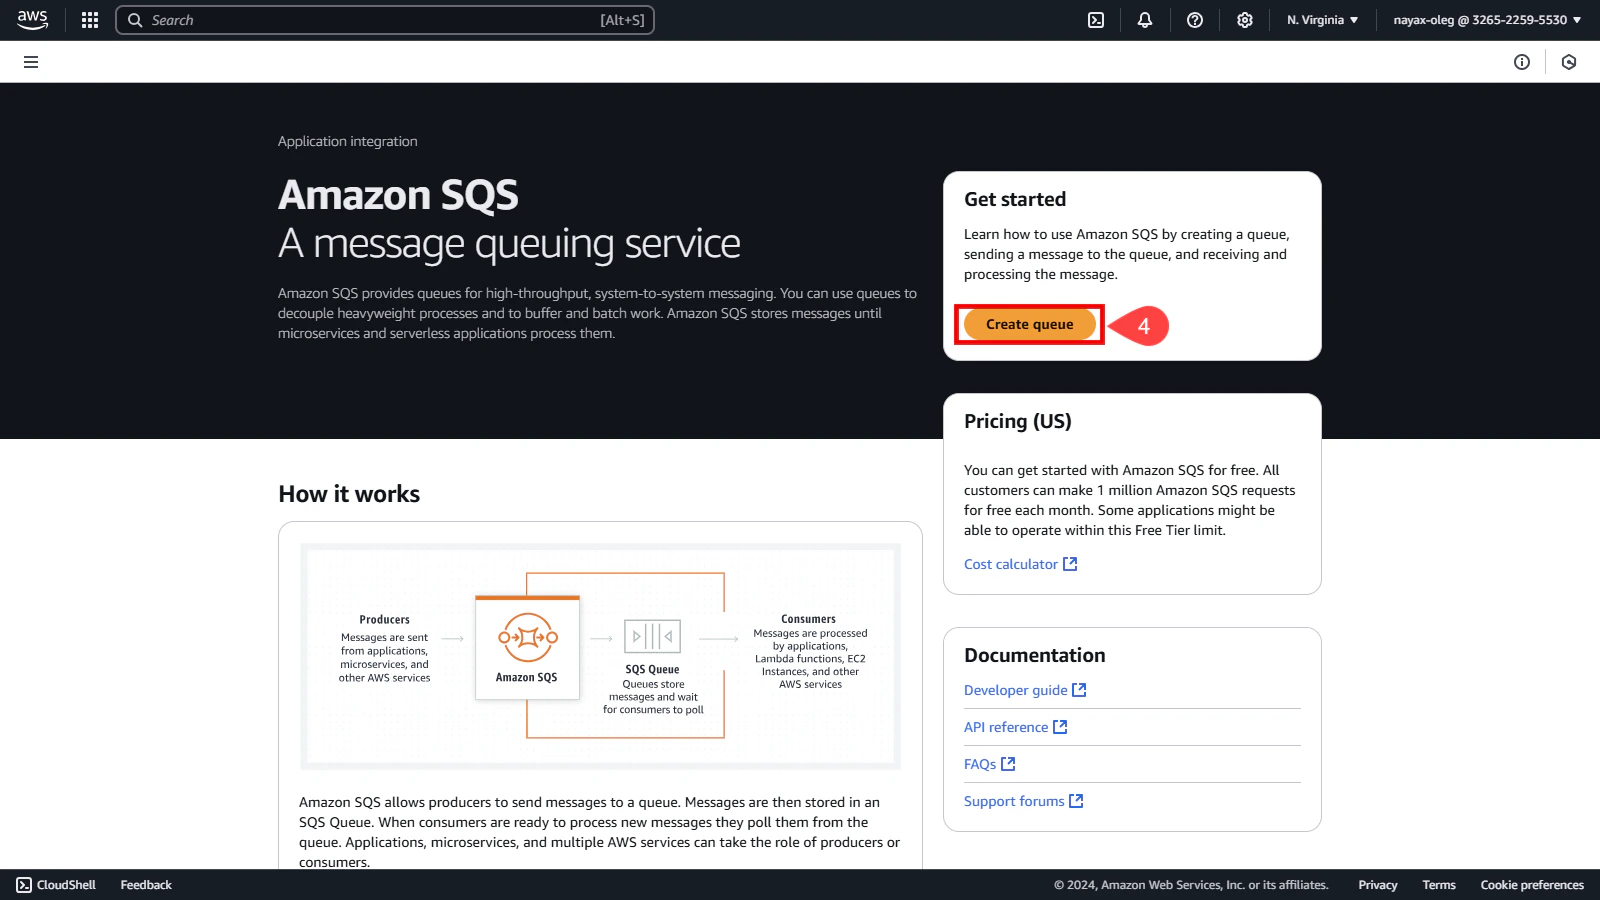
 4. Then, click **Create Queue**.
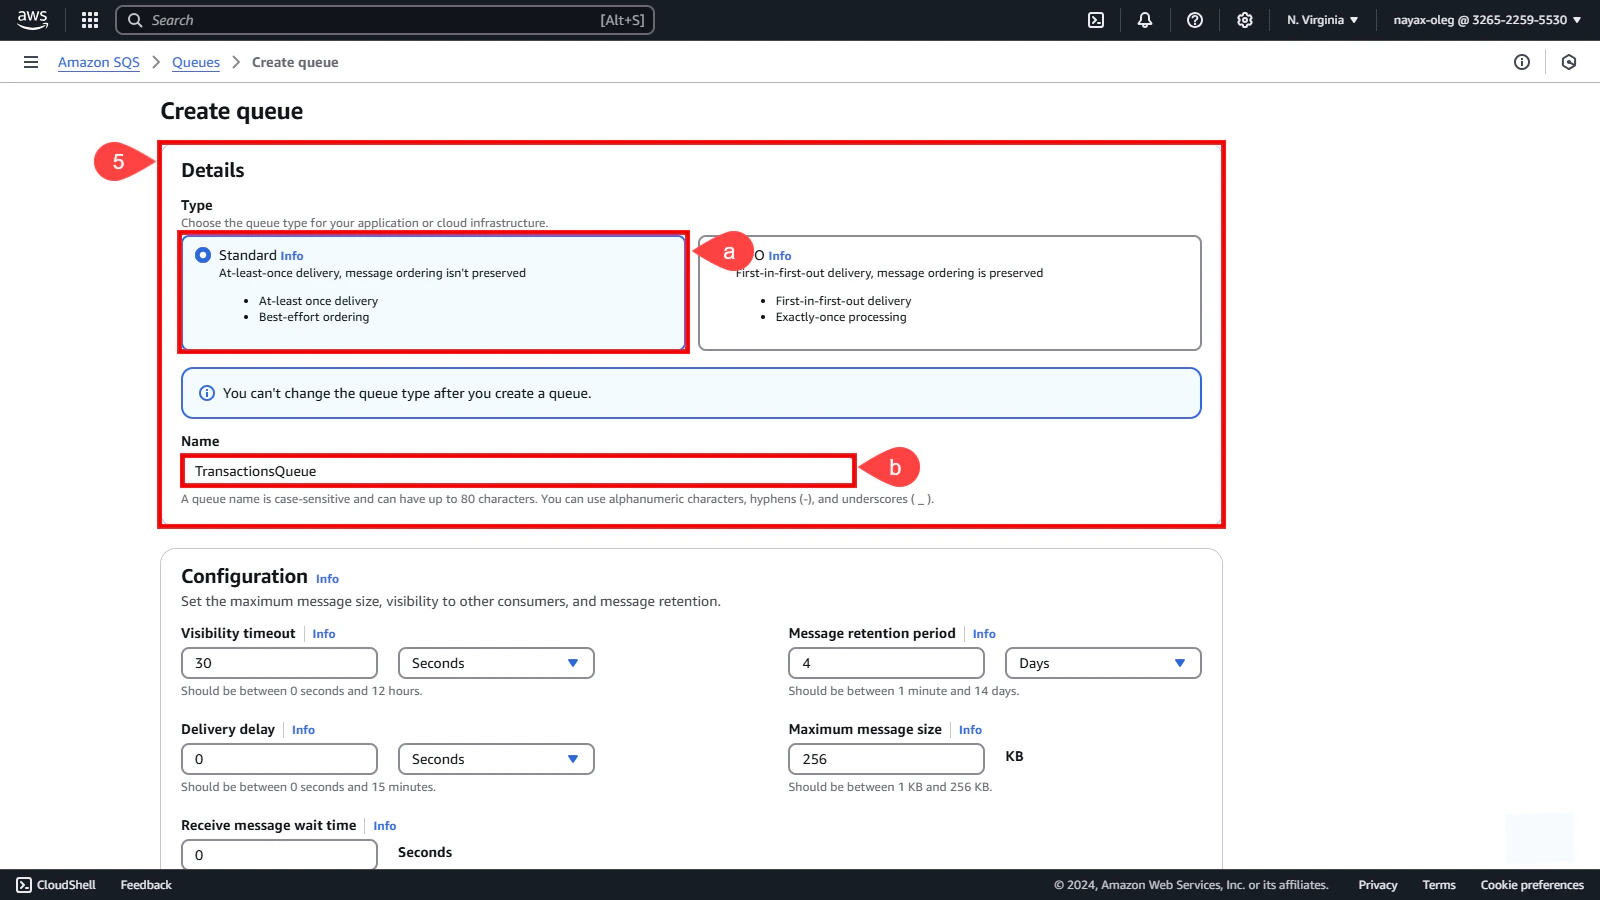
 5. In the **Details** section:
a. Select **Standard** as the queue type.
b. Enter a unique name for your queue.
5. In the **Details** section:
a. Select **Standard** as the queue type.
b. Enter a unique name for your queue.
 6. Configure the additional sections based on your needs:
* **Configuration:** Define basic settings for the queue.
* **Encryption:** Secure your queue messages with encryption.
* **Access policy:** Set permissions for accessing the queue.
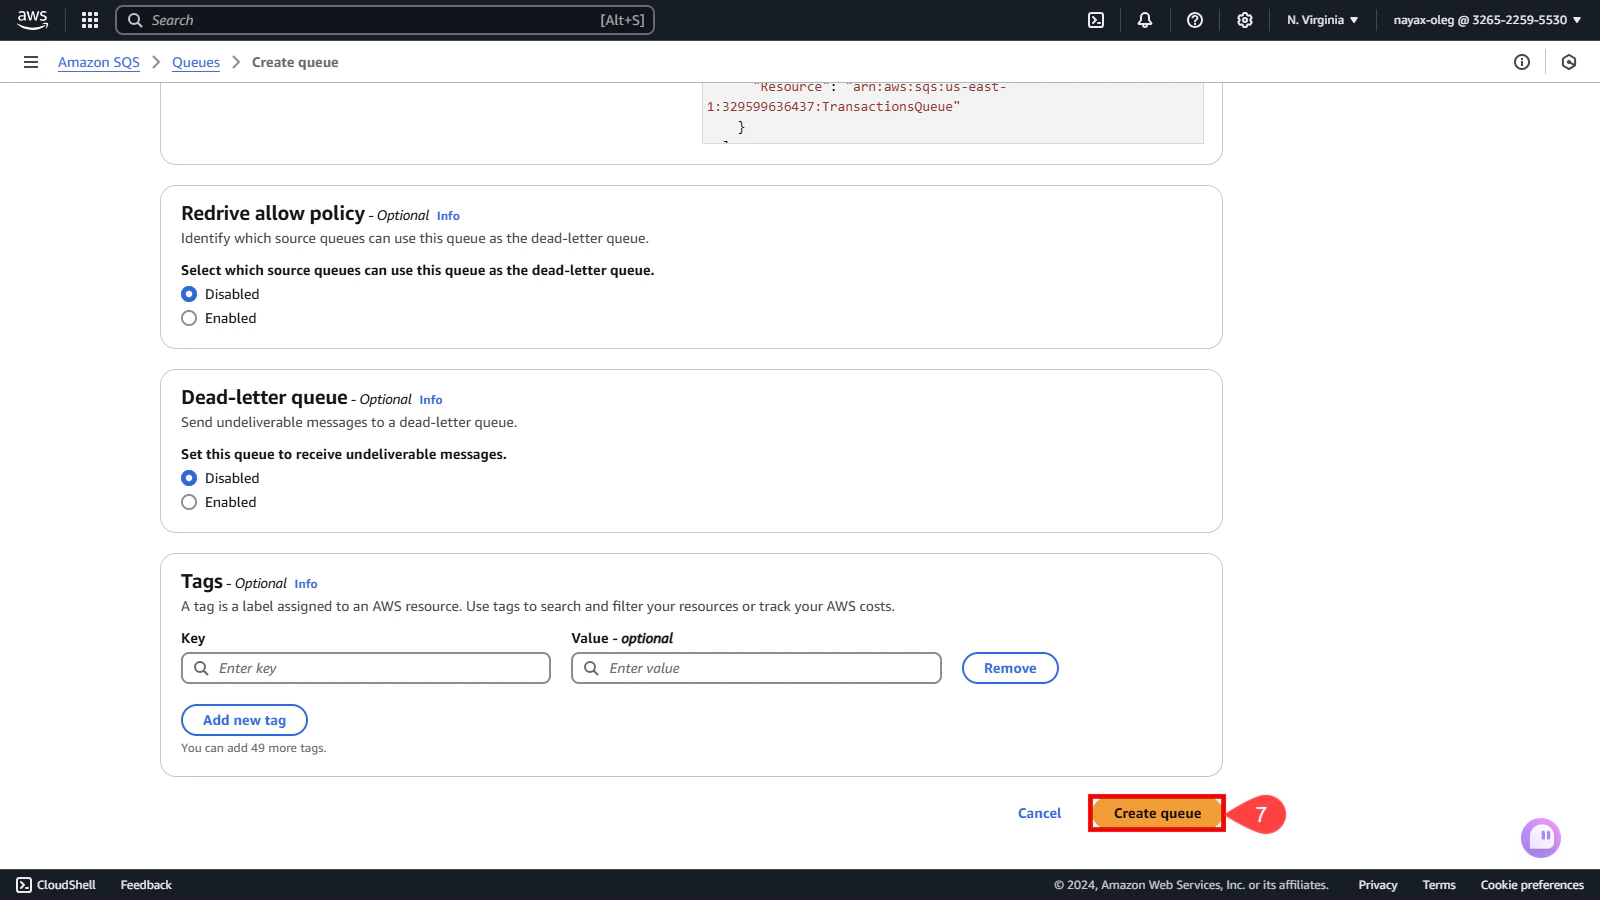
* **Redrive allow policy (Optional):** Enable or disable policies for message redriving.
* **Dead-letter queue (Optional):** Configure a queue for undeliverable messages.
* **Tags (Optional):** Add tags to categorize and manage your queue.
**Optional Sections**
Optional sections such as Redrive allow policy, Dead-letter queue, and Tags should be filled in based on your specific requirements. They help customize your queue's functionality and management.
7. Click the **Create Queue** button.
6. Configure the additional sections based on your needs:
* **Configuration:** Define basic settings for the queue.
* **Encryption:** Secure your queue messages with encryption.
* **Access policy:** Set permissions for accessing the queue.
* **Redrive allow policy (Optional):** Enable or disable policies for message redriving.
* **Dead-letter queue (Optional):** Configure a queue for undeliverable messages.
* **Tags (Optional):** Add tags to categorize and manage your queue.
**Optional Sections**
Optional sections such as Redrive allow policy, Dead-letter queue, and Tags should be filled in based on your specific requirements. They help customize your queue's functionality and management.
7. Click the **Create Queue** button.
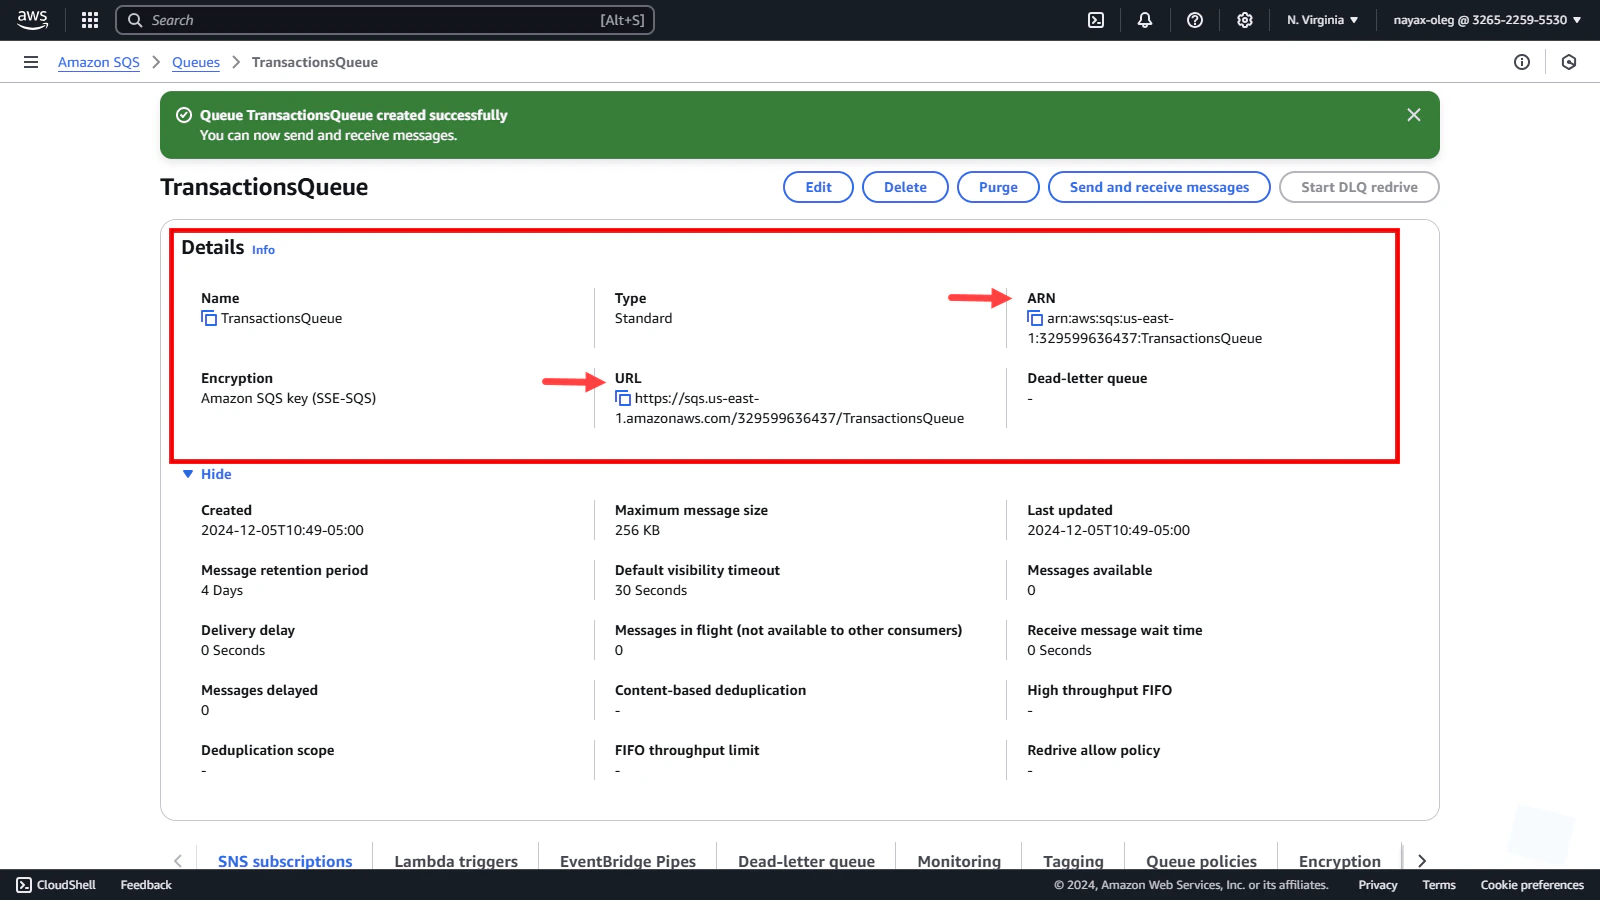
 Once the queue is successfully created, a confirmation message will appear on the screen along with the **Queue URL** and **ARN (Amazon Resource Name)**. Copy these values, which will be needed for integration and permissions setup in subsequent steps.