> ## Documentation Index
> Fetch the complete documentation index at: https://devzone.nayax.com/llms.txt
> Use this file to discover all available pages before exploring further.
# Queue Permissions
Having created the queue in the previous step, the next task is configuring permissions to manage access. This involves creating a policy, setting up user access, and assigning the policy to the created user. Policies define the actions allowed on the queue and are crucial for controlling access to your AWS resources.
## Manage Access to AWS Resources
To begin configuring access to your queue, you first need:
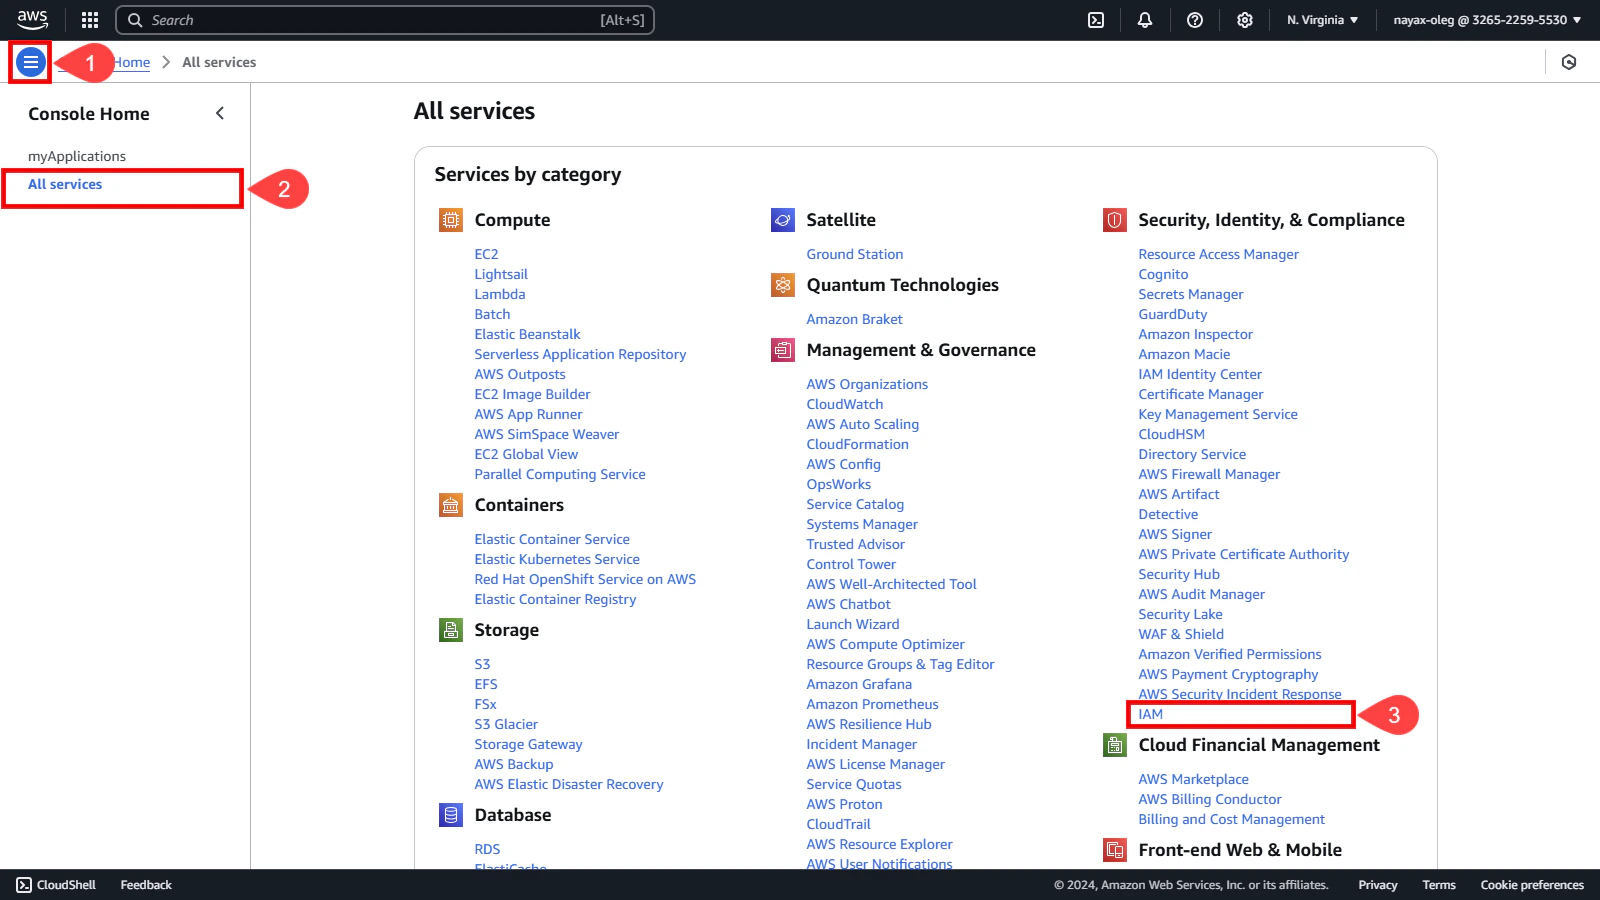
1. Click the **three lines** icon located in the upper left corner of the AWS console.
2. Select the **All services** option.
3. Search the **Security, Identity, & Compliance** category and select **IAM** (Identity and Access Management).
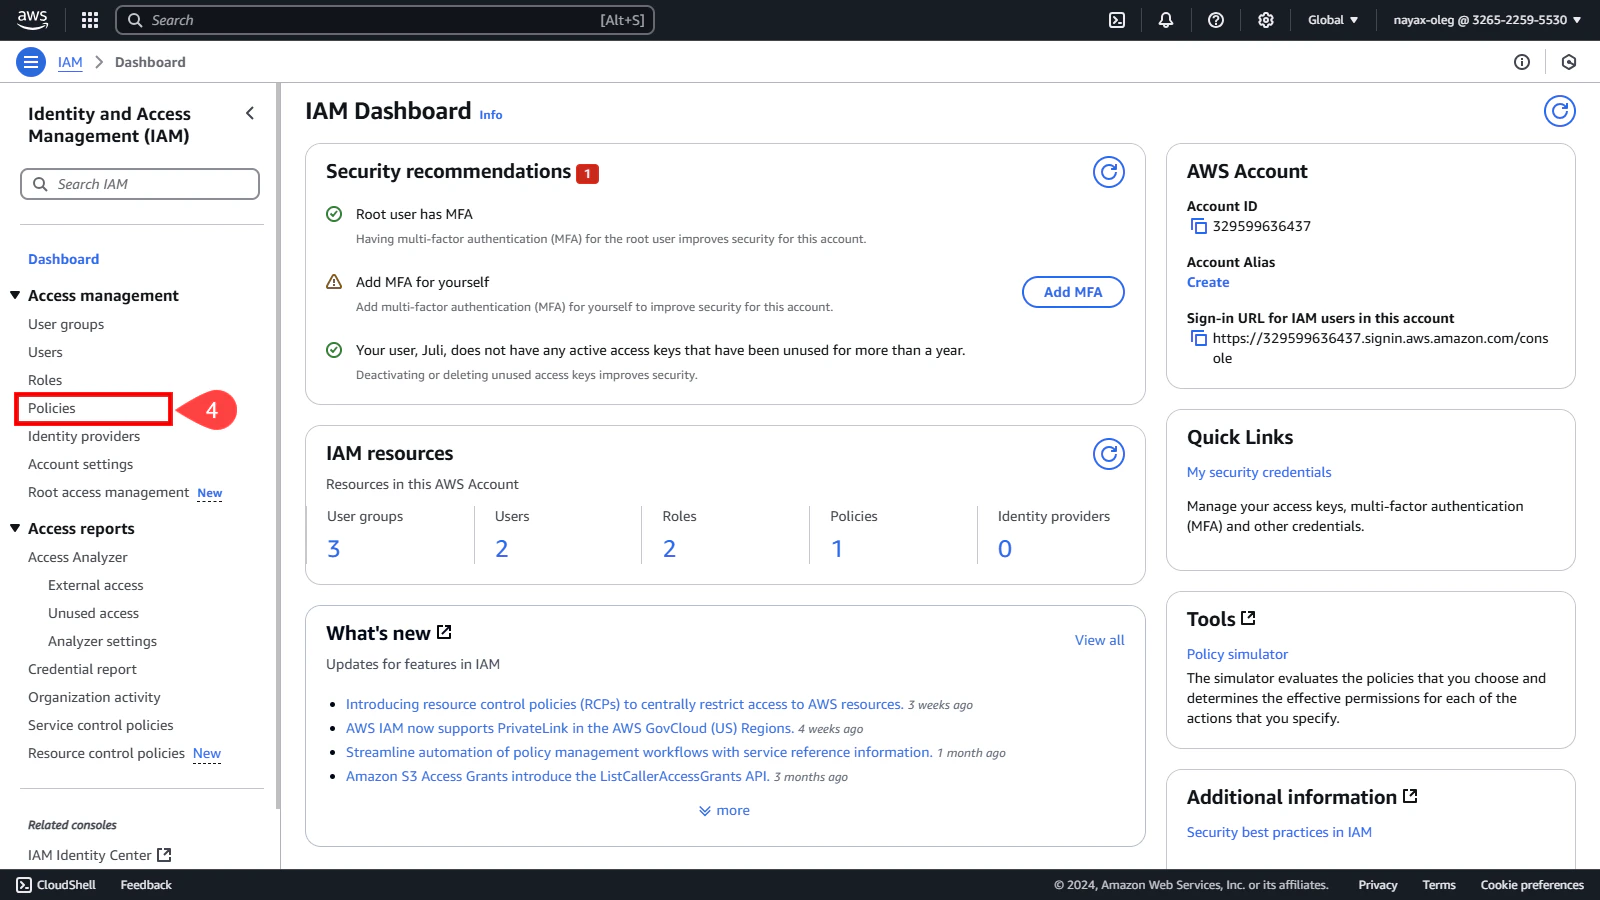
 4. Click **Policies** on the left side menu.
 ## Create Policy
Policies are created to define what actions users can perform on your queue. Follow these steps to create a new policy:
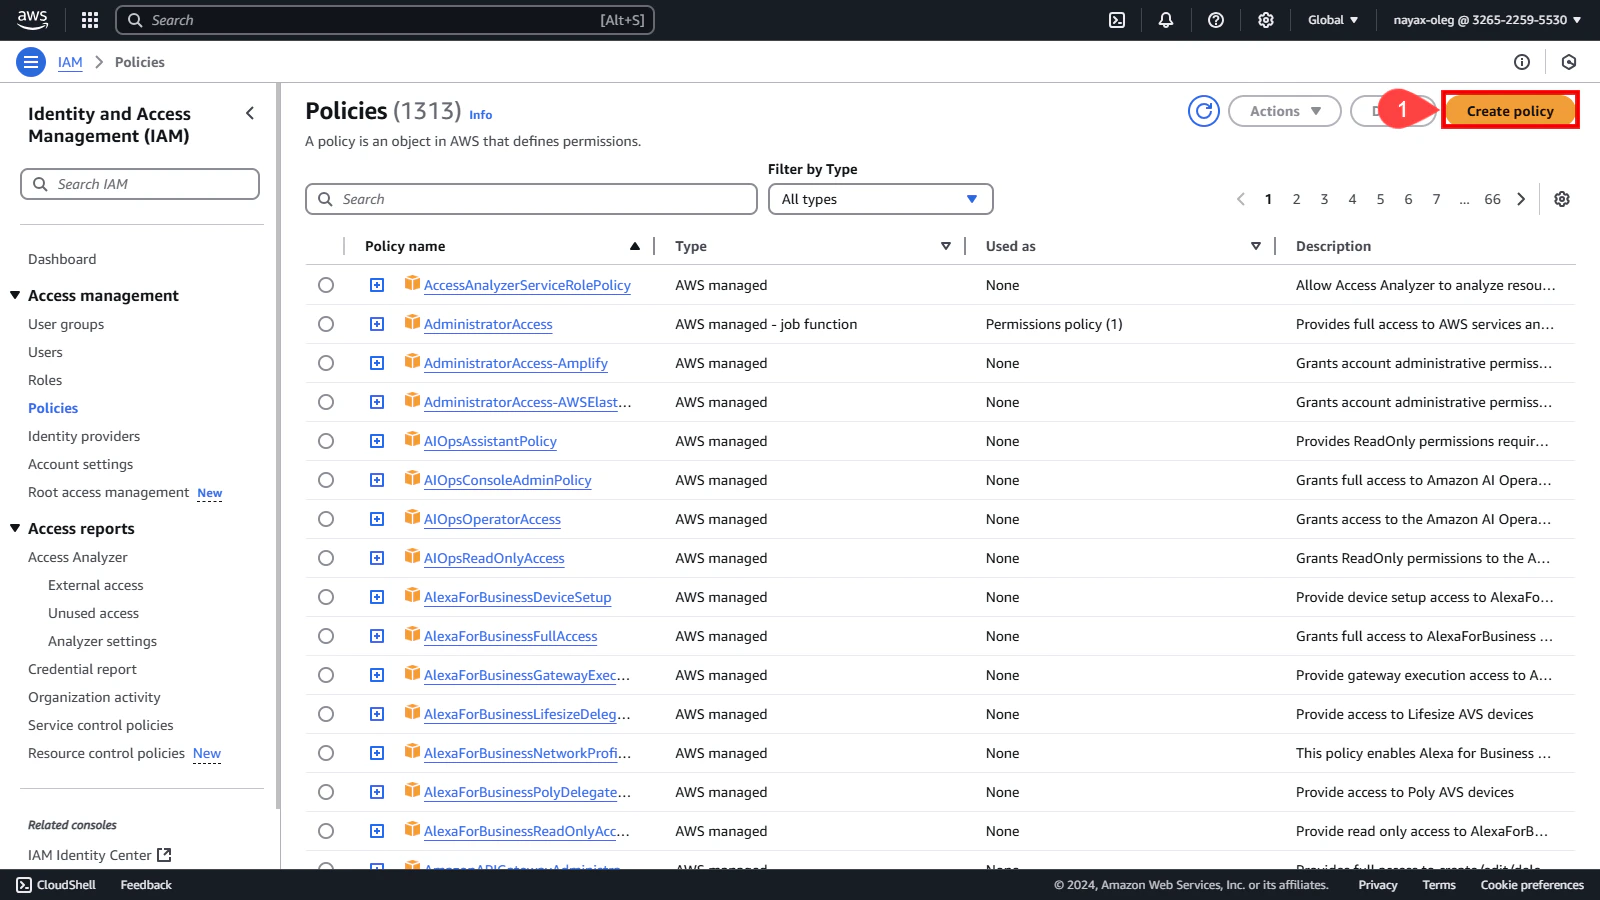
1. Click the **Create Policy** button.
## Create Policy
Policies are created to define what actions users can perform on your queue. Follow these steps to create a new policy:
1. Click the **Create Policy** button.
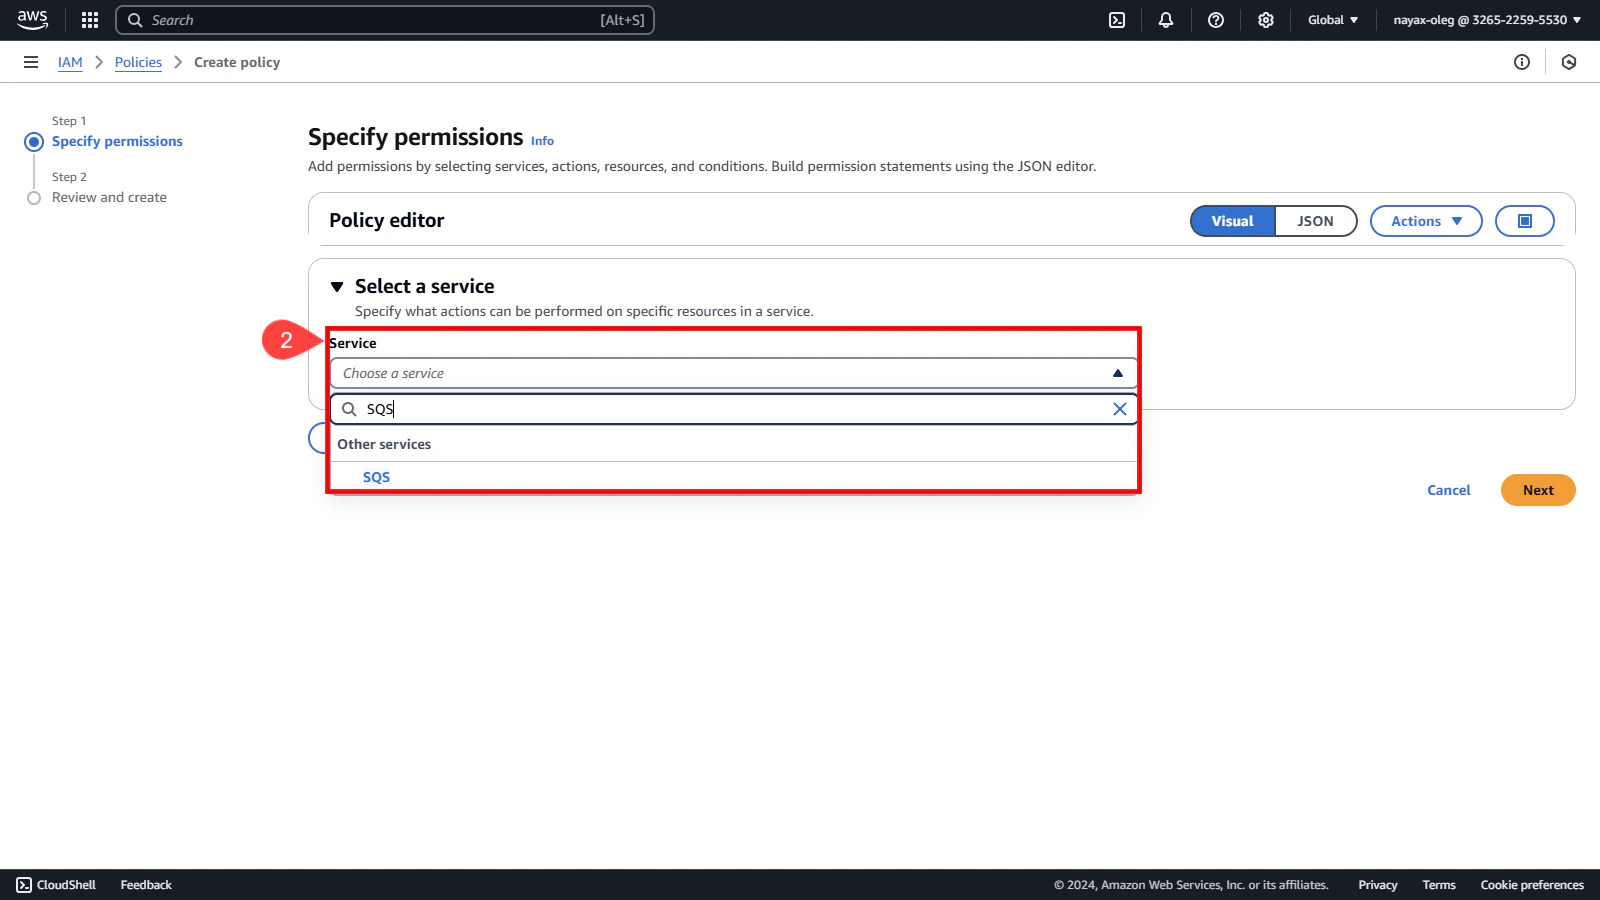
 2. In the **Service > Choose a service** field, search and select **SQS**.
 ## Set Permissions for SQS
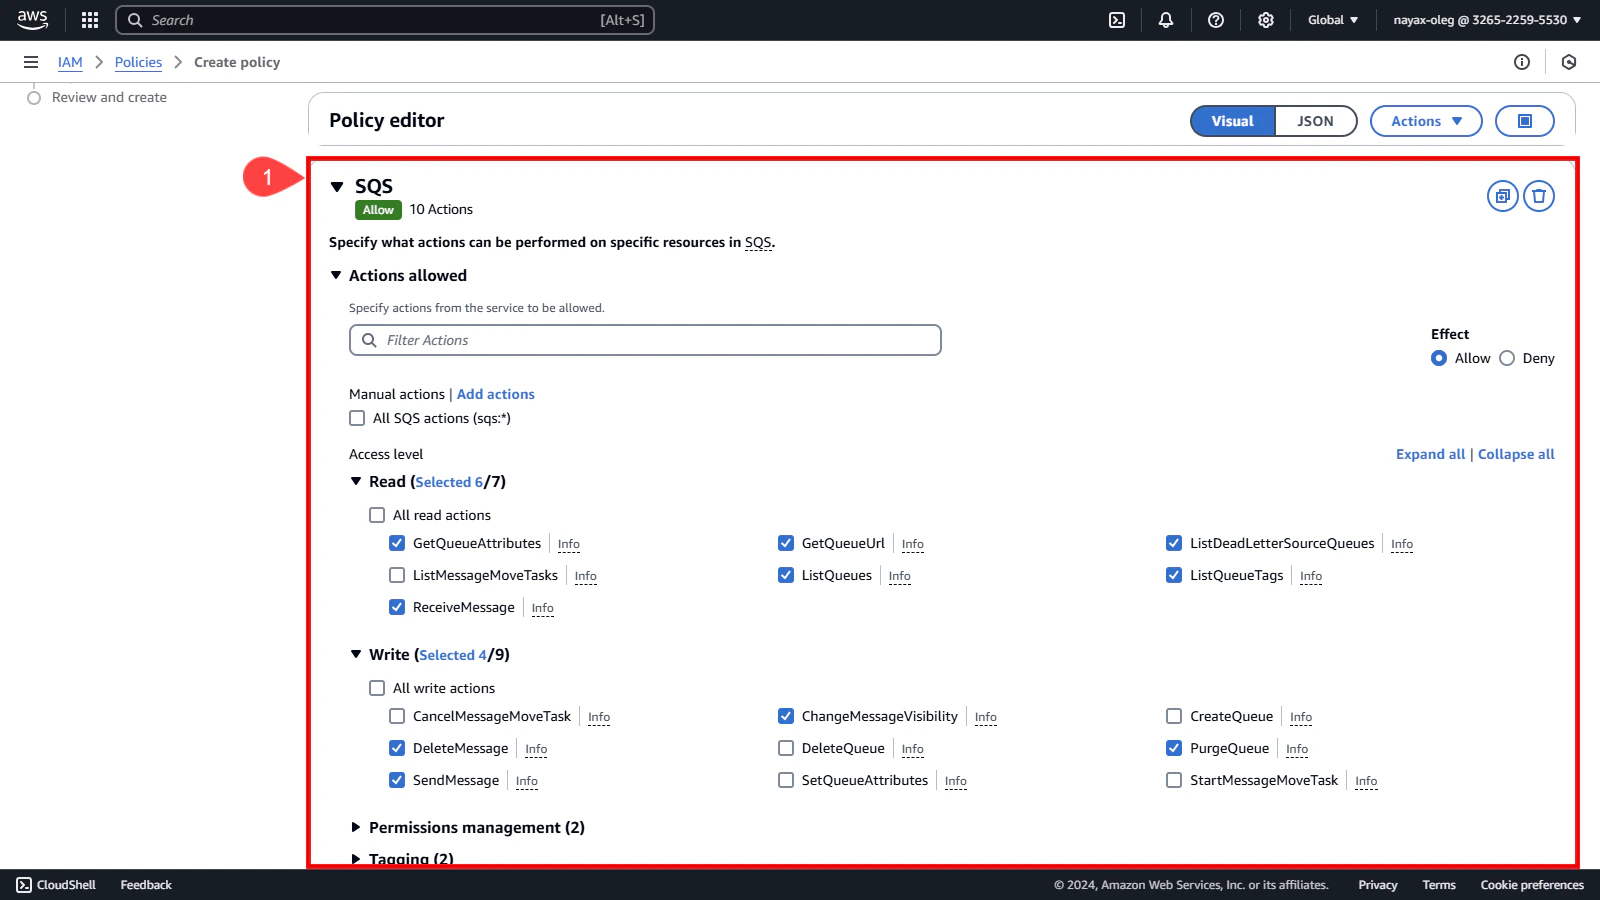
Now that you’ve selected SQS as the service, define the permissions needed for the queue:
1. Under **Actions**, select the permissions you need for the queue.
## Set Permissions for SQS
Now that you’ve selected SQS as the service, define the permissions needed for the queue:
1. Under **Actions**, select the permissions you need for the queue.
 ## Set Policy to Specific ARN
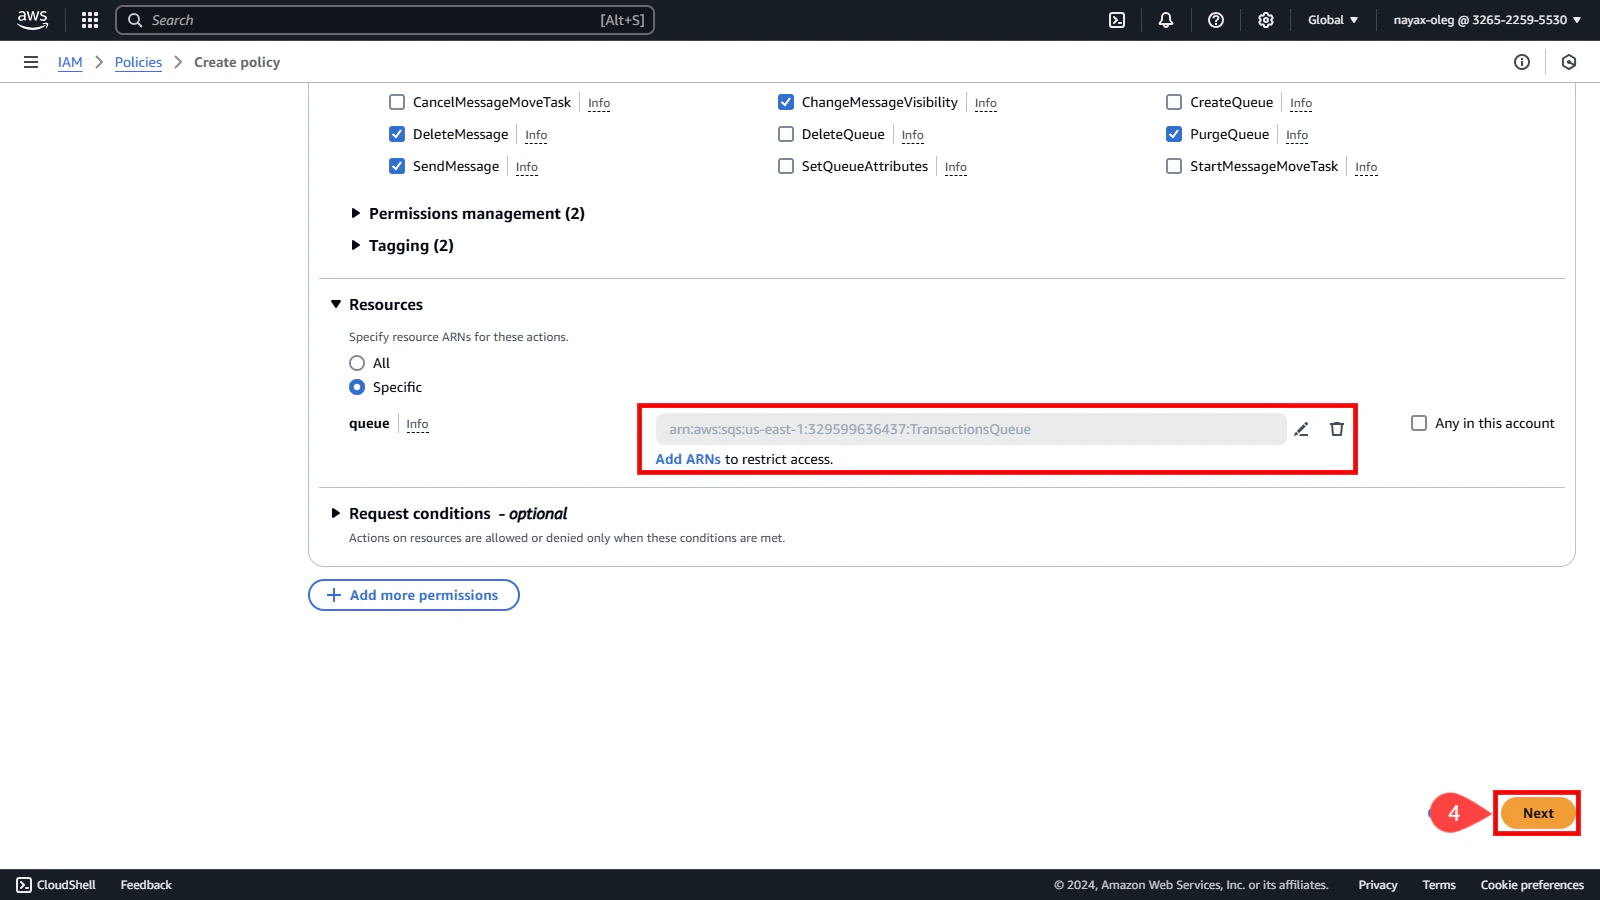
The Policy you are creating can be assigned to any Queue. In this case, you’ll assign it to the specific queue created earlier.
**Resources**
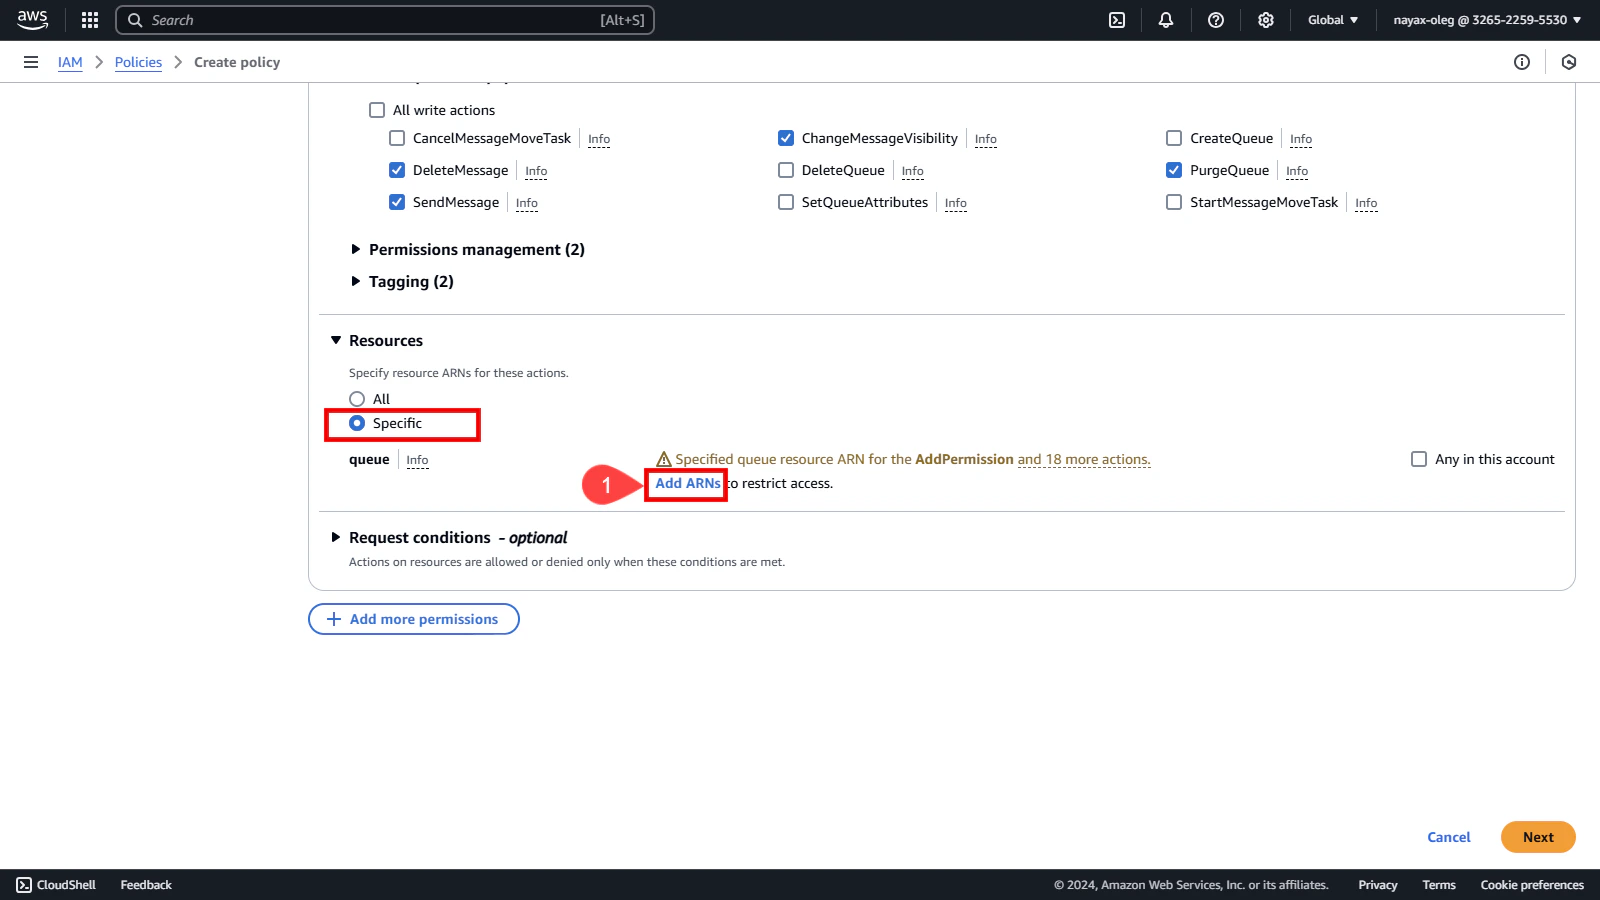
Ensure that the **Specific** resource is selected.
To Add the ARN of the previously created queue, follow these steps:
1. Click **Add ARNs**.
## Set Policy to Specific ARN
The Policy you are creating can be assigned to any Queue. In this case, you’ll assign it to the specific queue created earlier.
**Resources**
Ensure that the **Specific** resource is selected.
To Add the ARN of the previously created queue, follow these steps:
1. Click **Add ARNs**.
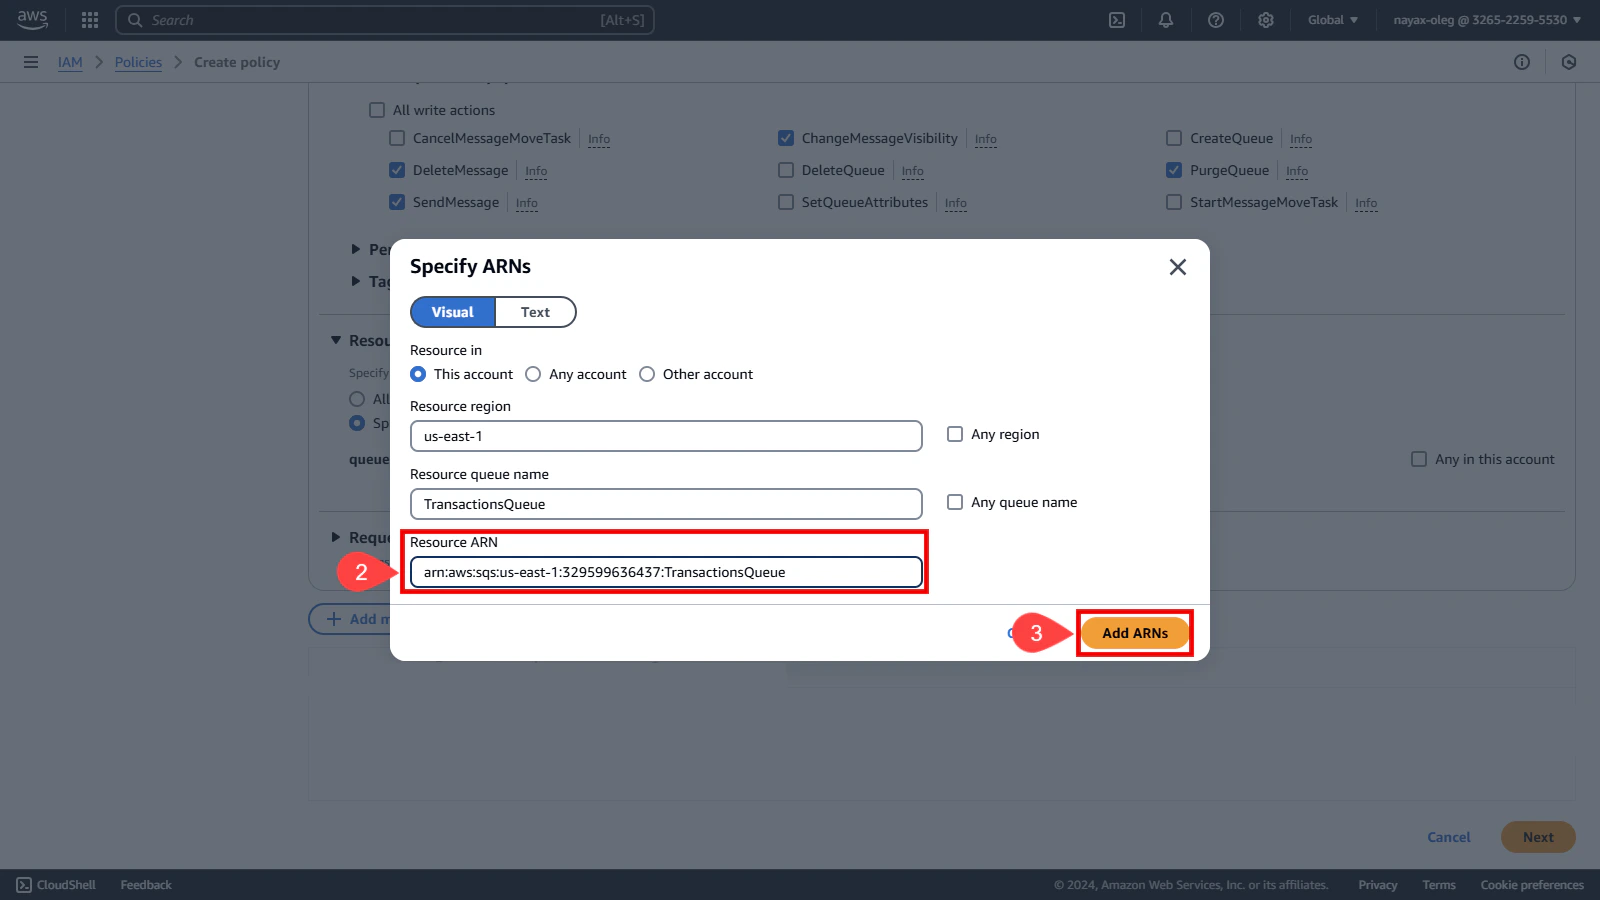
 2. Enter the copied ARN in the **Resource ARN** field. You can find this value from the confirmation screen displayed at the end of the [**Create New Queue**](/docs/manage-data-operations/amazon-sqs/amazon-queue-setup/create-new-queue) process.
3. Click the **Add ARNs** button.
2. Enter the copied ARN in the **Resource ARN** field. You can find this value from the confirmation screen displayed at the end of the [**Create New Queue**](/docs/manage-data-operations/amazon-sqs/amazon-queue-setup/create-new-queue) process.
3. Click the **Add ARNs** button.
 4. Click the **Next** button.
 ## Review and Create the Policy
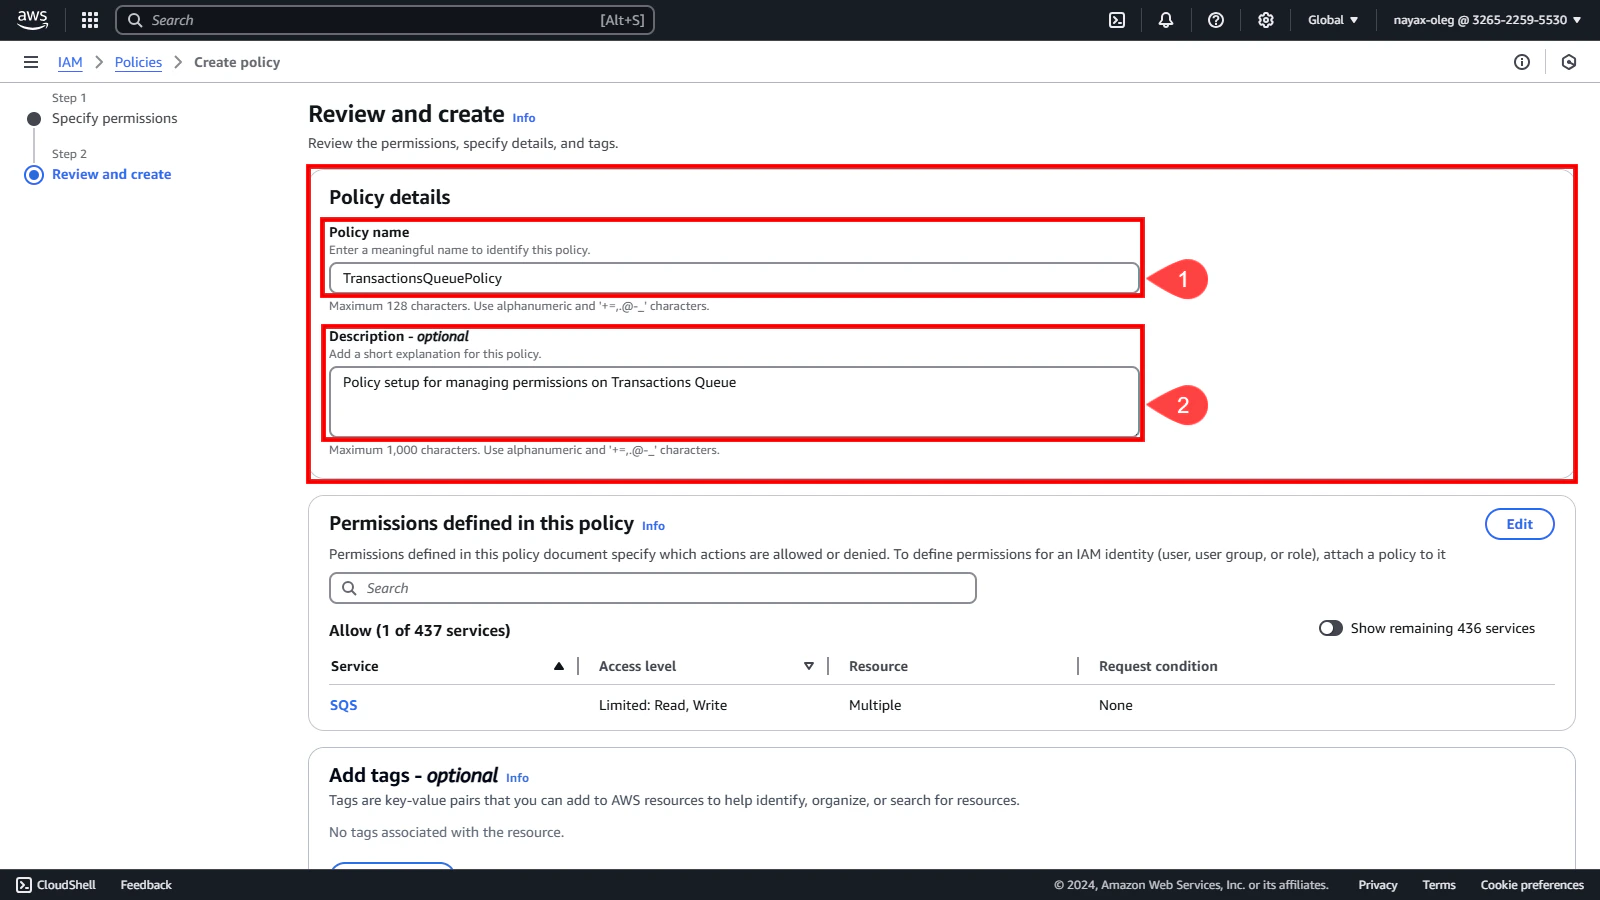
Before finalizing the policy, review its details to ensure all configurations are correct. This step is essential to avoid potential issues with permissions.
In the **Policy details** section:
1. Enter a unique **name** to identify this policy.
2. Add a description for this policy **(Optional)**.
## Review and Create the Policy
Before finalizing the policy, review its details to ensure all configurations are correct. This step is essential to avoid potential issues with permissions.
In the **Policy details** section:
1. Enter a unique **name** to identify this policy.
2. Add a description for this policy **(Optional)**.
 3. Finally, click the **Create Policy** button.
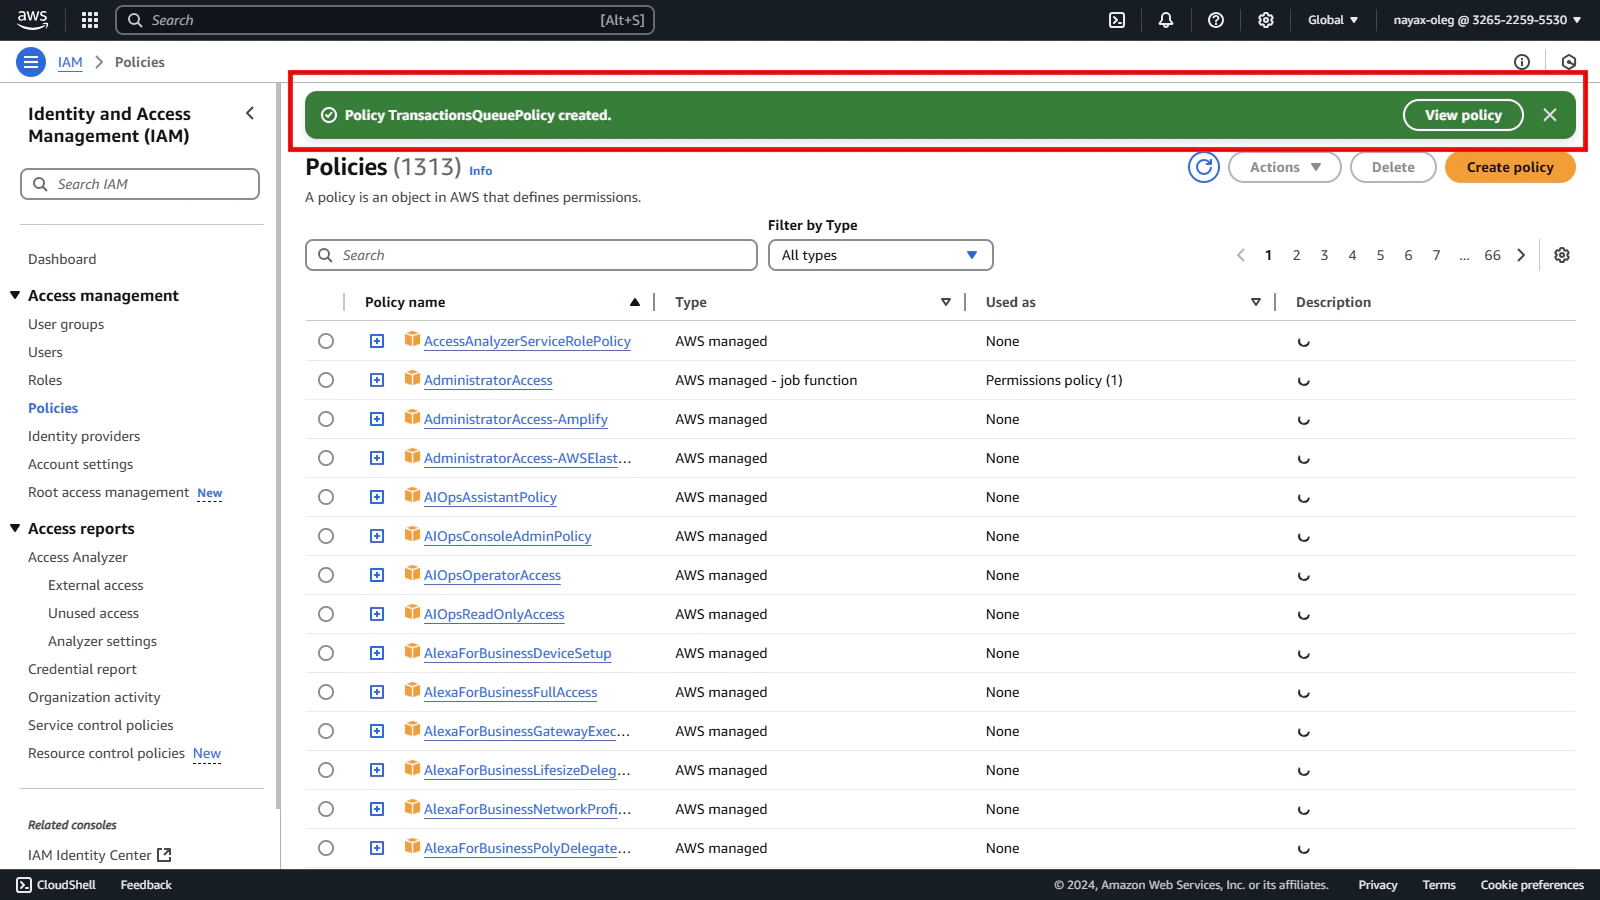
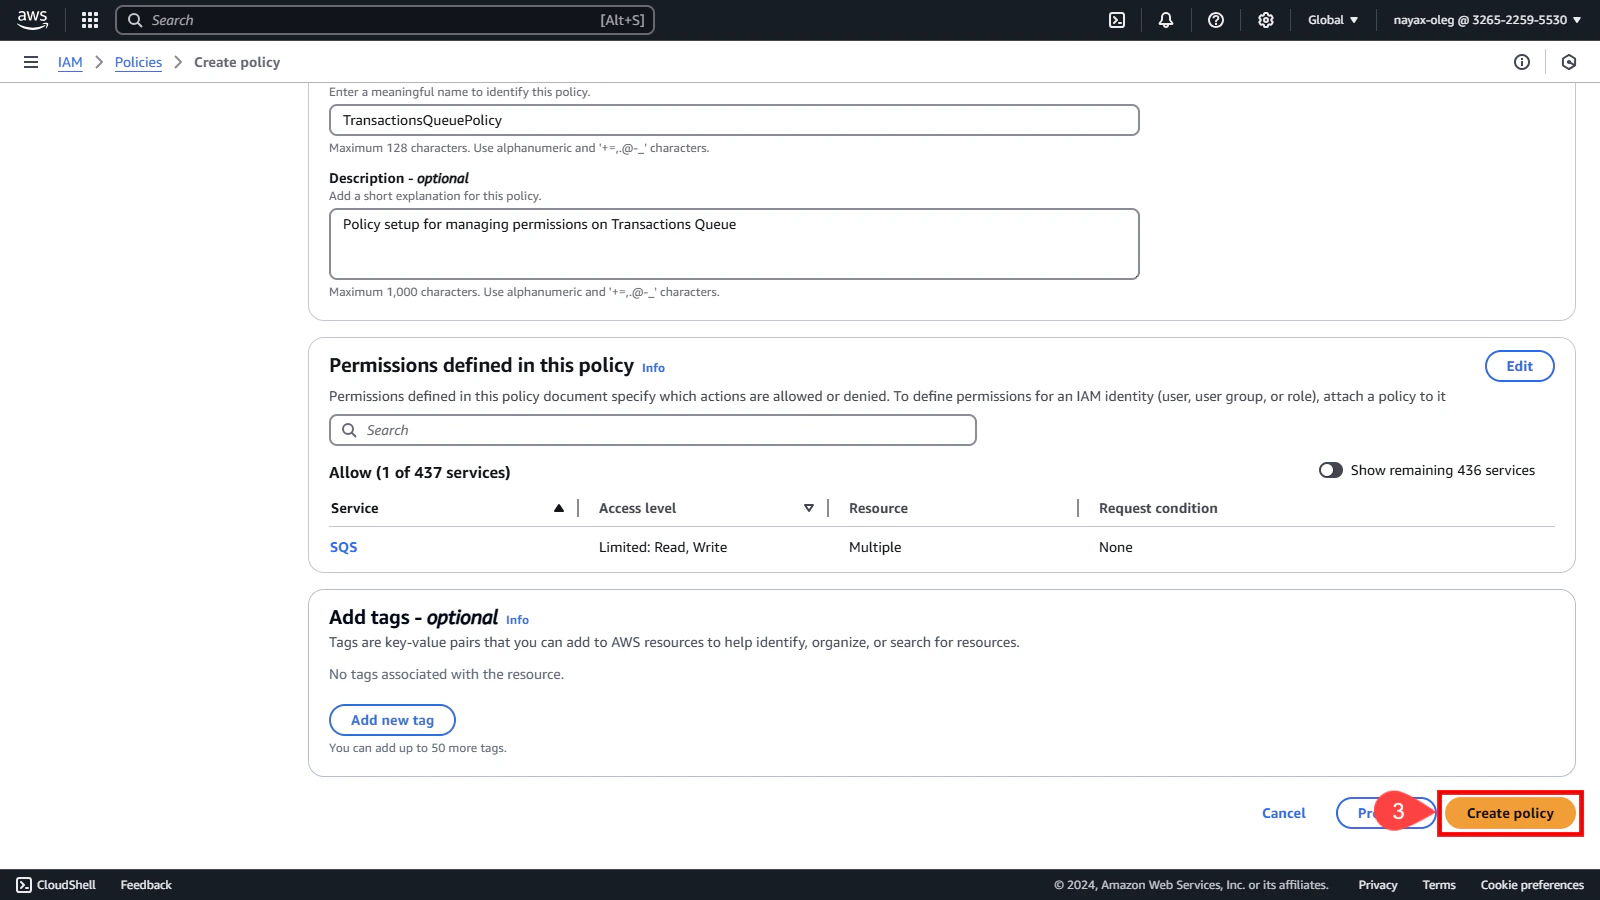 Once the policy is created, you will receive a confirmation that it has been successfully set up.