> ## Documentation Index
> Fetch the complete documentation index at: https://devzone.nayax.com/llms.txt
> Use this file to discover all available pages before exploring further.
# 安装步骤
Touch 设备包括所有配备触摸屏的 Nayax 设备,例如 Nayax VPOS Touch 和 Onyx。这些设备专为支付、监控和网络管理等高级功能而设计。
Media 设备包括新一代触摸屏设备(VPOS Media 5,以及即将推出但尚不支持的 VPOS Media 4 Mini),也称为 VPOS Media 4S。路线图中还计划推出 VPOS Media 10。
笔记
我们有 VPOSM 4 和 VPOSM 4S 两款独立的设备。在文档和手册中,您只会看到关于 VPOSM 4S 的说明,因为 VPOSM 4 不支持 Marshall。
以下是正确安装这些设备的步骤。
## 系统要求
安装前,必须通过后台更新 NayaxVend 管理系统(Nayax Core)。
请注意,购买后,Nayax 支持团队会为设备预先配置标准机器参数。对于特定机器,请确保系统中的相关参数已更新以匹配其要求。
如需更多支持或进一步信息,请联系您当地的 Nayax 支持团队。
笔记
要完成集成,需要一个 SDK 示例应用程序来测试真实的购买场景。
## 安装 - VPOS Touch
### 插入 SIM 卡
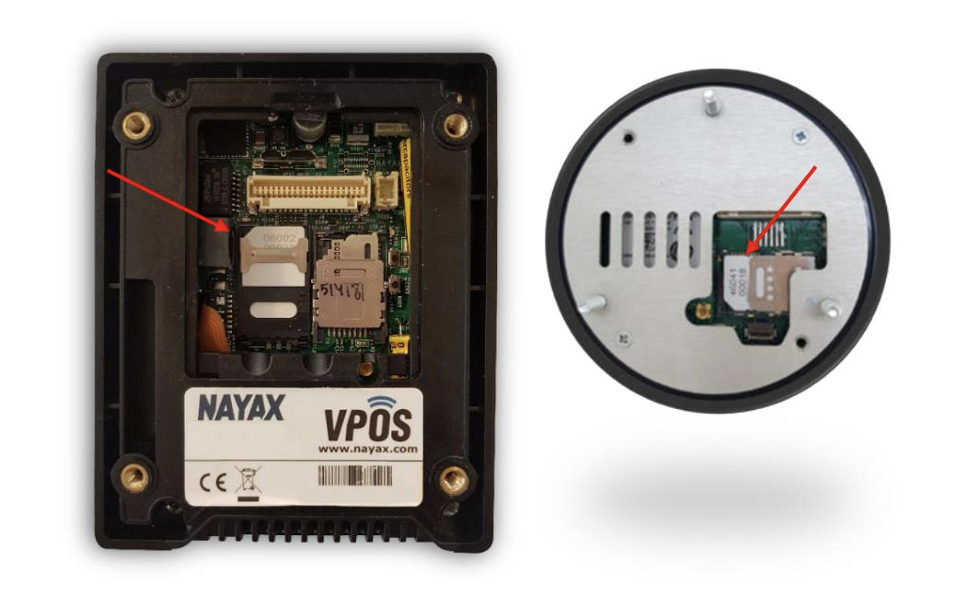
默认情况下,SIM 卡已安装完毕。如果尚未安装,请确保在开始集成之前,SIM 卡已准备好插入和安装。
1. 找到设备顶部的 SIM 卡插槽。
2. 将 SIM 卡插入插槽,确保牢固安装到位。
 ### 连接 Marshall 电缆
在连接 Marshall 电缆之前,请确保所有必要组件均已就绪。
1. 将 Touch 设备的电缆连接器插入 Nayax 设备。
### 连接 Marshall 电缆
在连接 Marshall 电缆之前,请确保所有必要组件均已就绪。
1. 将 Touch 设备的电缆连接器插入 Nayax 设备。
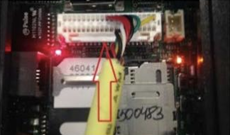 2. 将 COM 2 / Marshall 连接器连接到 PC。
3. 将电源适配器连接器连接到 Marshall 电缆。
### 设置网络
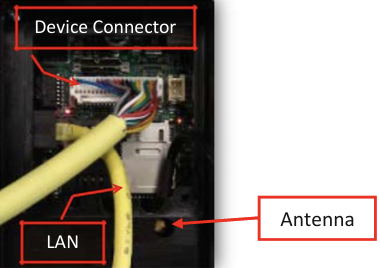
现在,是时候为您的 Touch 设备设置网络了。为确保一切正常运行,您必须连接蜂窝天线和 LAN(以太网)电缆。
#### 连接天线(蜂窝网络)
要启用蜂窝网络连接,请按照以下步骤操作:
1. 找到设备上的 SMA 连接器。
2. 将天线的**SMA 母头连接器**连接到 Touch 设备上的**SMA 公头连接器**。
2. 将 COM 2 / Marshall 连接器连接到 PC。
3. 将电源适配器连接器连接到 Marshall 电缆。
### 设置网络
现在,是时候为您的 Touch 设备设置网络了。为确保一切正常运行,您必须连接蜂窝天线和 LAN(以太网)电缆。
#### 连接天线(蜂窝网络)
要启用蜂窝网络连接,请按照以下步骤操作:
1. 找到设备上的 SMA 连接器。
2. 将天线的**SMA 母头连接器**连接到 Touch 设备上的**SMA 公头连接器**。
 #### 可选 - 连接 LAN 电缆(以太网)
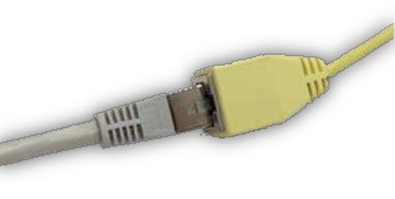
要设置有线网络连接,请将以太网线插入设备的 LAN 端口。确保网线的另一端连接到路由器或网络交换机。
#### 可选 - 连接 LAN 电缆(以太网)
要设置有线网络连接,请将以太网线插入设备的 LAN 端口。确保网线的另一端连接到路由器或网络交换机。
 设备与 Nayax 服务器通信的以太网连接优先级(不用于 Marshall 通信)
当以太网和 SIM 连接同时处于活动状态时,系统会自动优先使用以太网连接。这可确保更高的稳定性和更快的网络性能。如果以太网连接出现任何稳定性问题——设备将切换到 SIM 进行通信,并在一段时间后尝试重新连接以太网。
VPOST 不支持通过 ETH 使用 Marshall
## 安装 - VPOS Media
### 连接 Marshall 电缆
1. 将 Media 设备的电缆连接器插入 Nayax 设备。VPOSM5:
设备与 Nayax 服务器通信的以太网连接优先级(不用于 Marshall 通信)
当以太网和 SIM 连接同时处于活动状态时,系统会自动优先使用以太网连接。这可确保更高的稳定性和更快的网络性能。如果以太网连接出现任何稳定性问题——设备将切换到 SIM 进行通信,并在一段时间后尝试重新连接以太网。
VPOST 不支持通过 ETH 使用 Marshall
## 安装 - VPOS Media
### 连接 Marshall 电缆
1. 将 Media 设备的电缆连接器插入 Nayax 设备。VPOSM5:
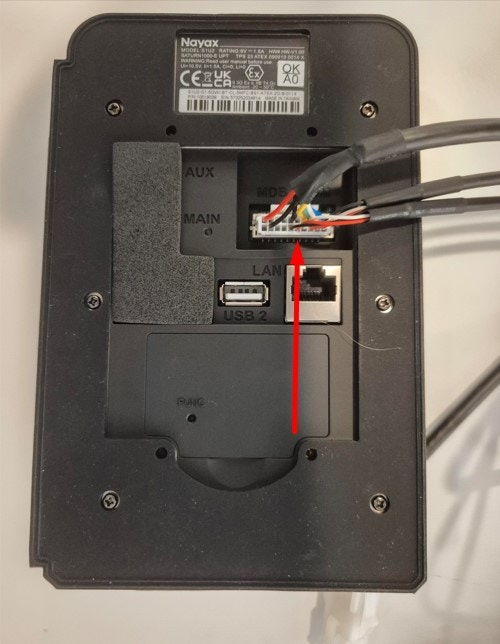 VPOSM 4S:
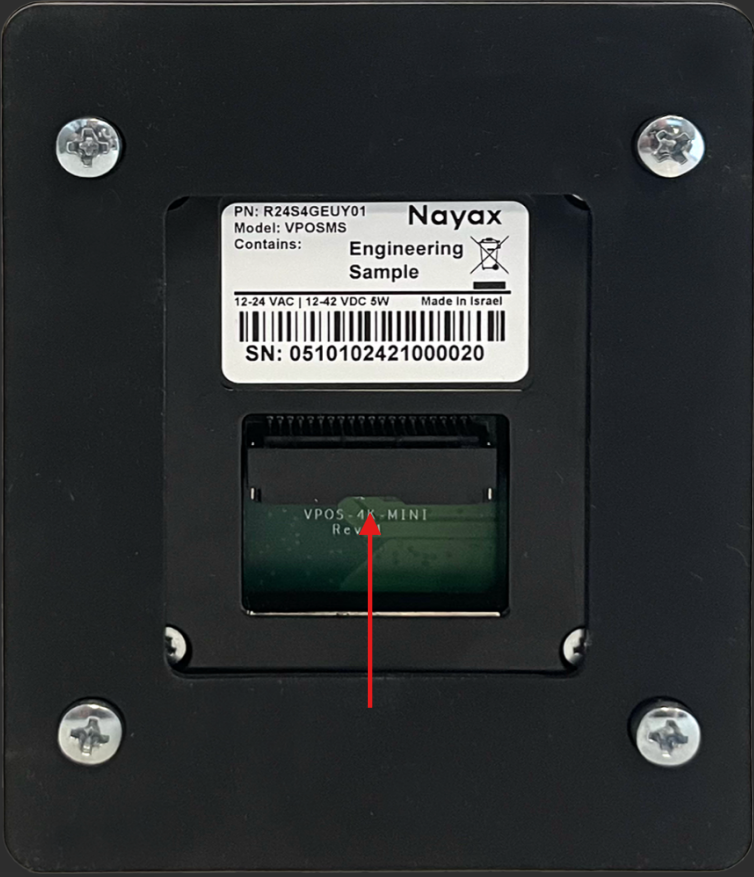 2. Marshall over RS232:
将 COM 2(Marshall)接口直接或通过 Chipi-x 连接到电脑。请注意,Chipi-x 是唯一获得 Nayax 技术团队认可的 USB 转 COM 适配器。
VPOSM5:
2. Marshall over RS232:
将 COM 2(Marshall)接口直接或通过 Chipi-x 连接到电脑。请注意,Chipi-x 是唯一获得 Nayax 技术团队认可的 USB 转 COM 适配器。
VPOSM5:
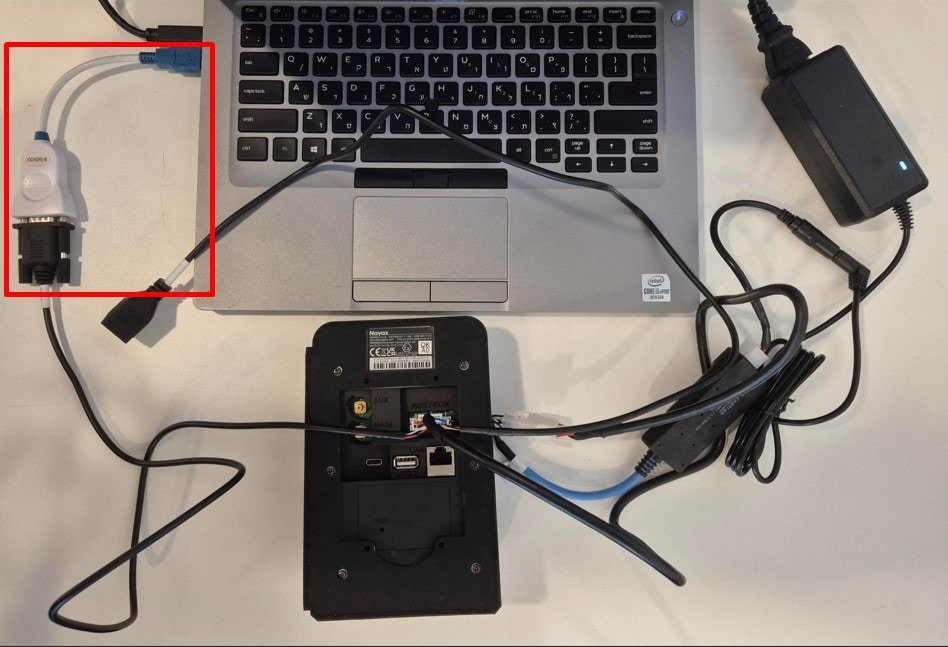 VPOSM 4S:
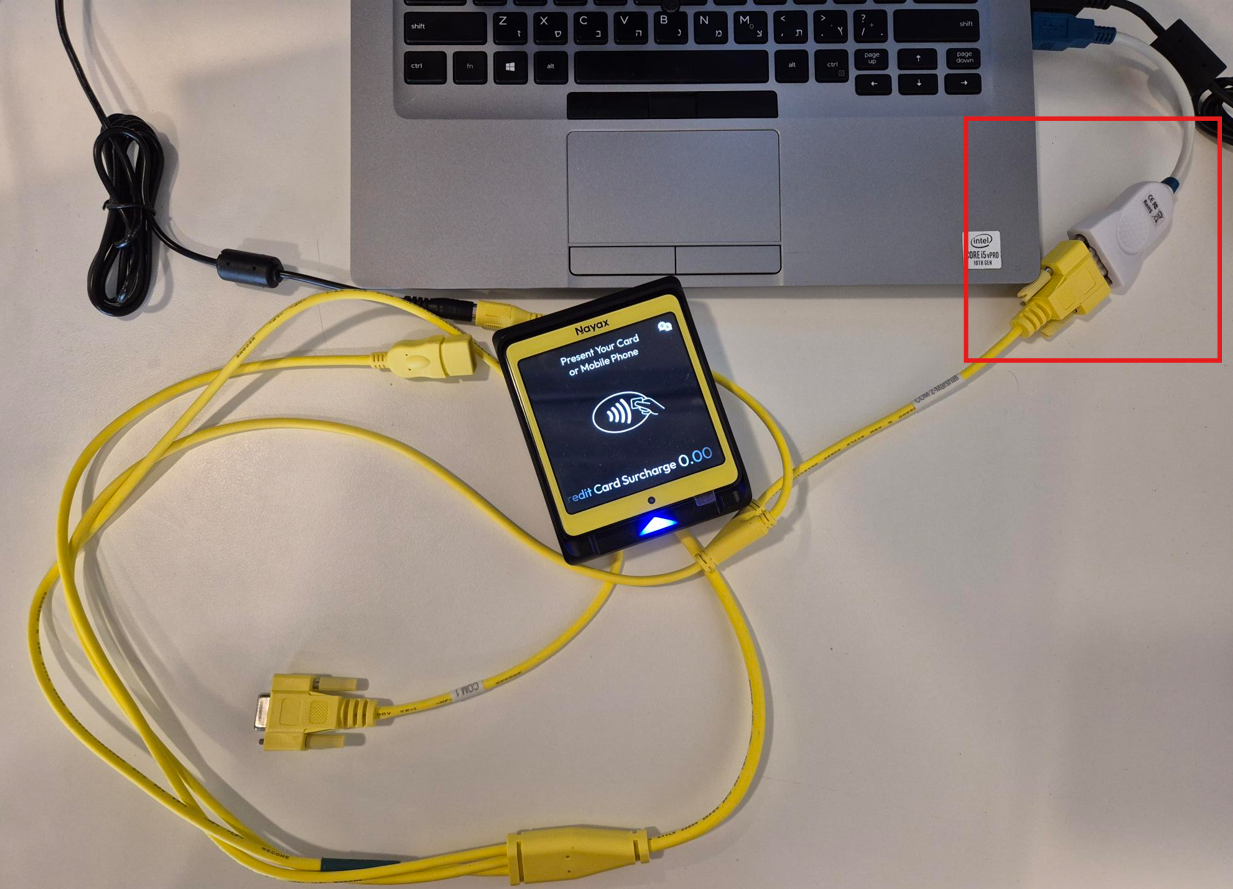 Marshall over ETH:
VPOSM5 和 VPOSM4S 支持通过 ETH(LAN 和 WIFI)进行 Marshall 功能。
在这种情况下,您可以将 LAN 连接器连接到设备:
VPOSM5:
Marshall over ETH:
VPOSM5 和 VPOSM4S 支持通过 ETH(LAN 和 WIFI)进行 Marshall 功能。
在这种情况下,您可以将 LAN 连接器连接到设备:
VPOSM5:
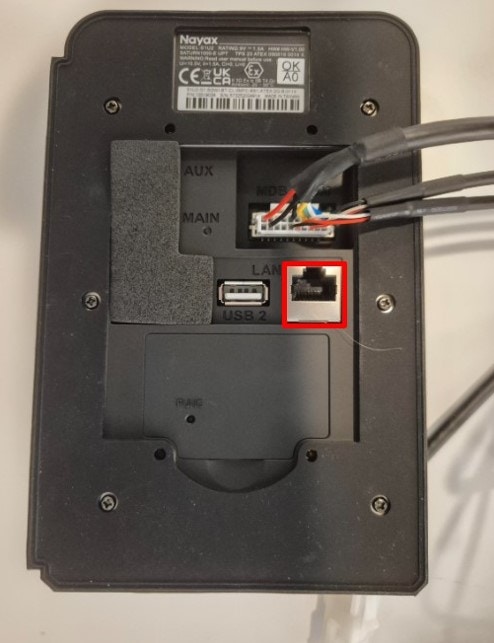 VPOSM4S:
您需要使用 USB-C 转 RJ45 连接线(需单独购买)并将其连接到设备的背面。
VPOSM4S:
您需要使用 USB-C 转 RJ45 连接线(需单独购买)并将其连接到设备的背面。
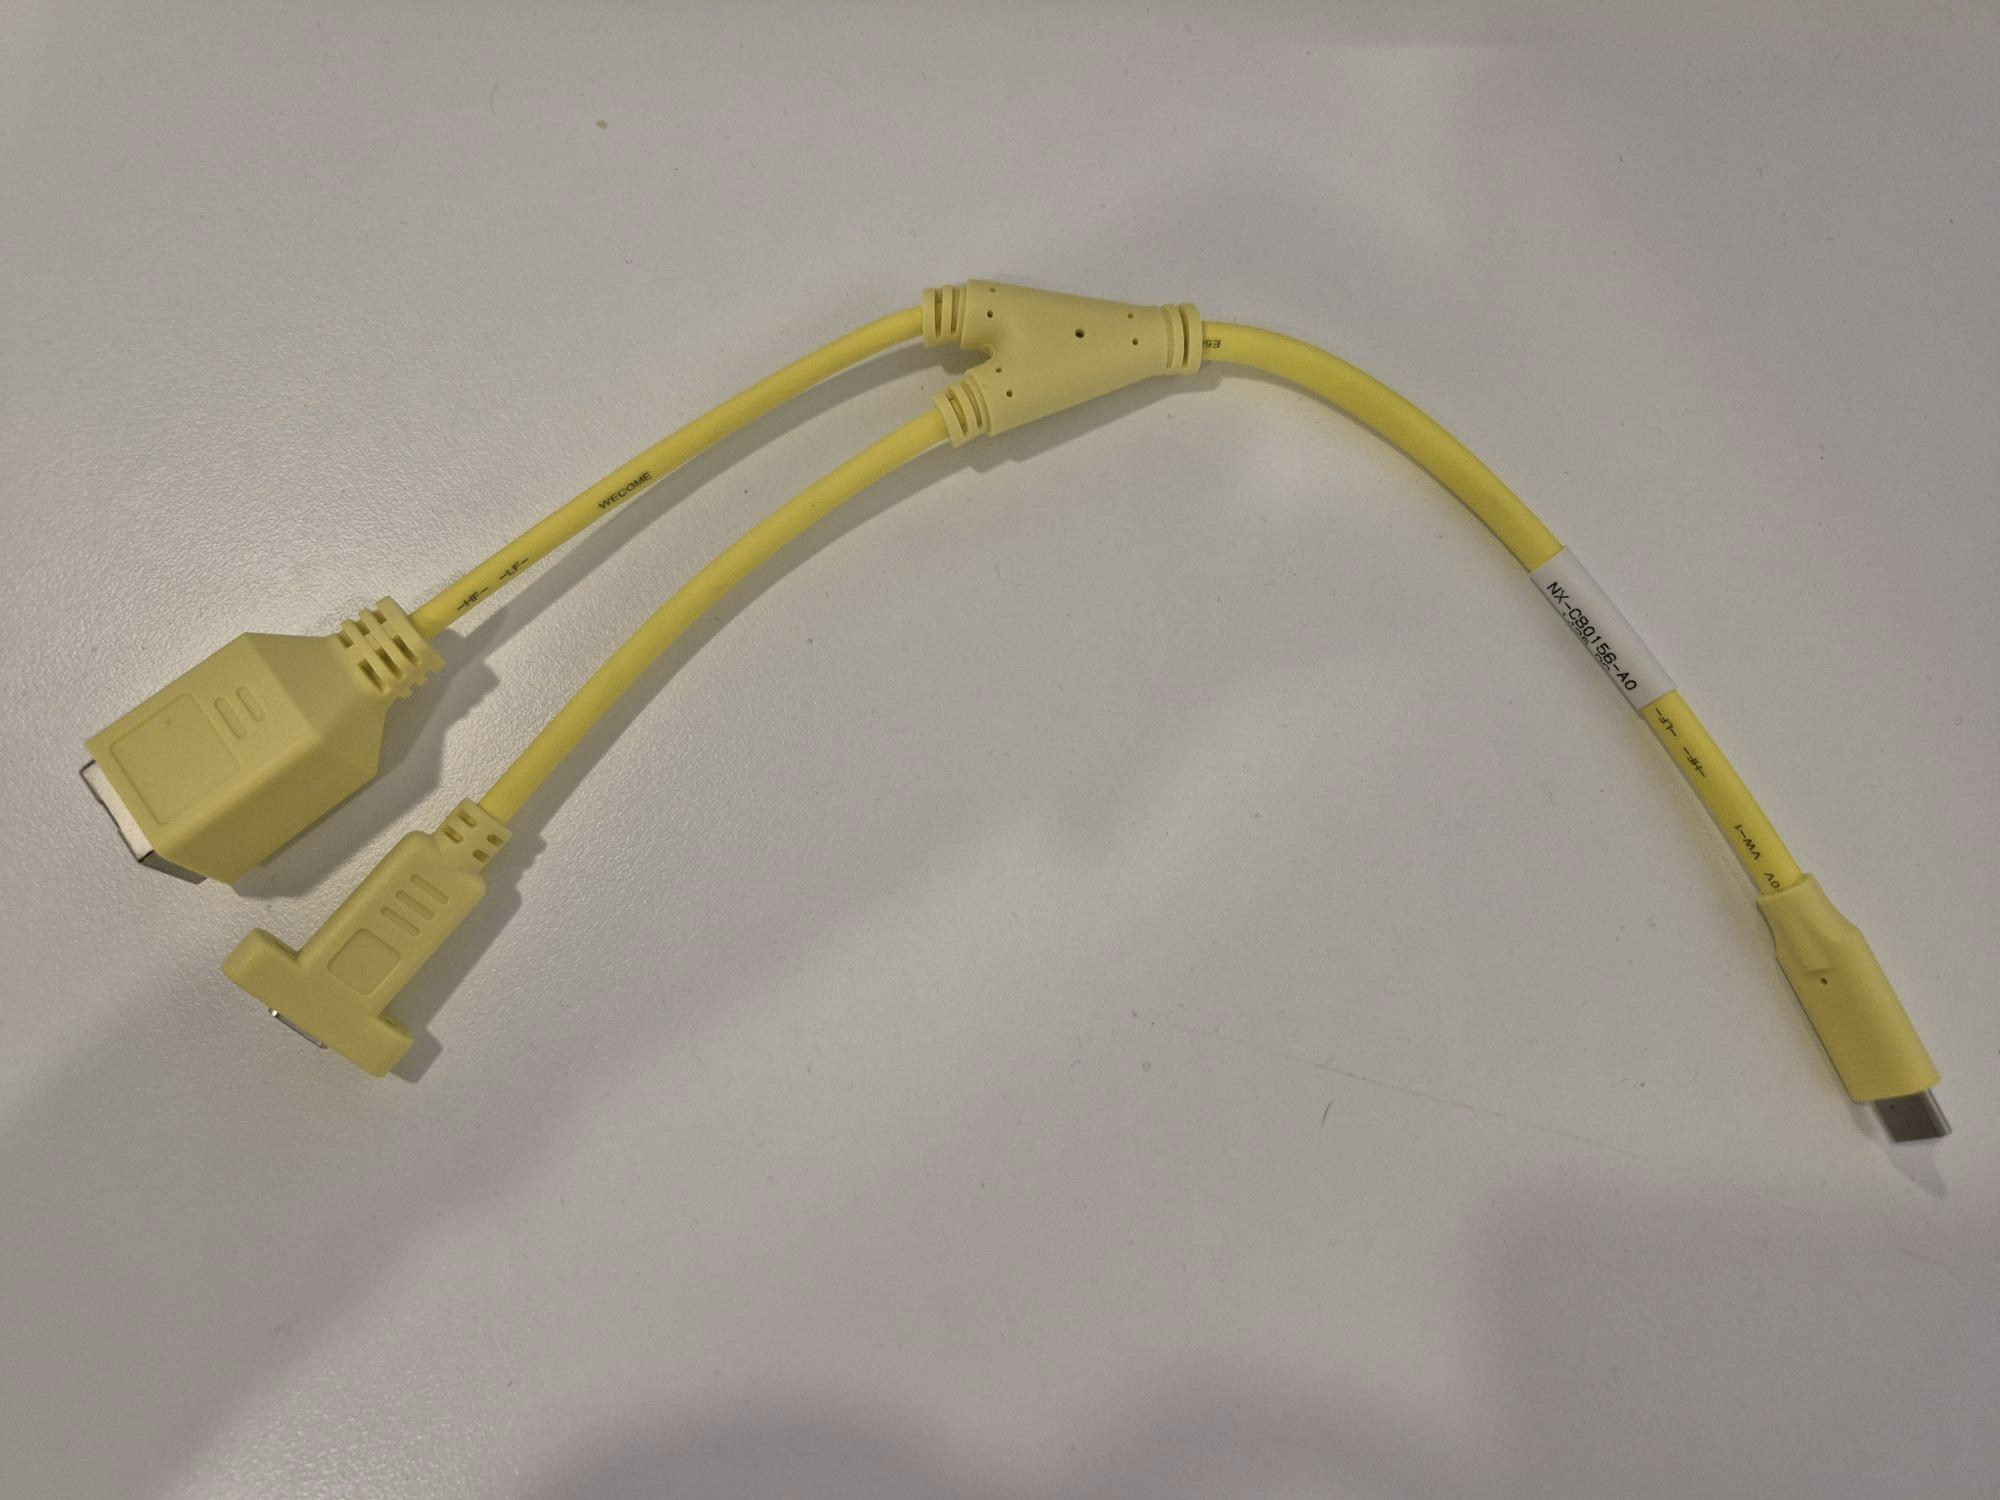
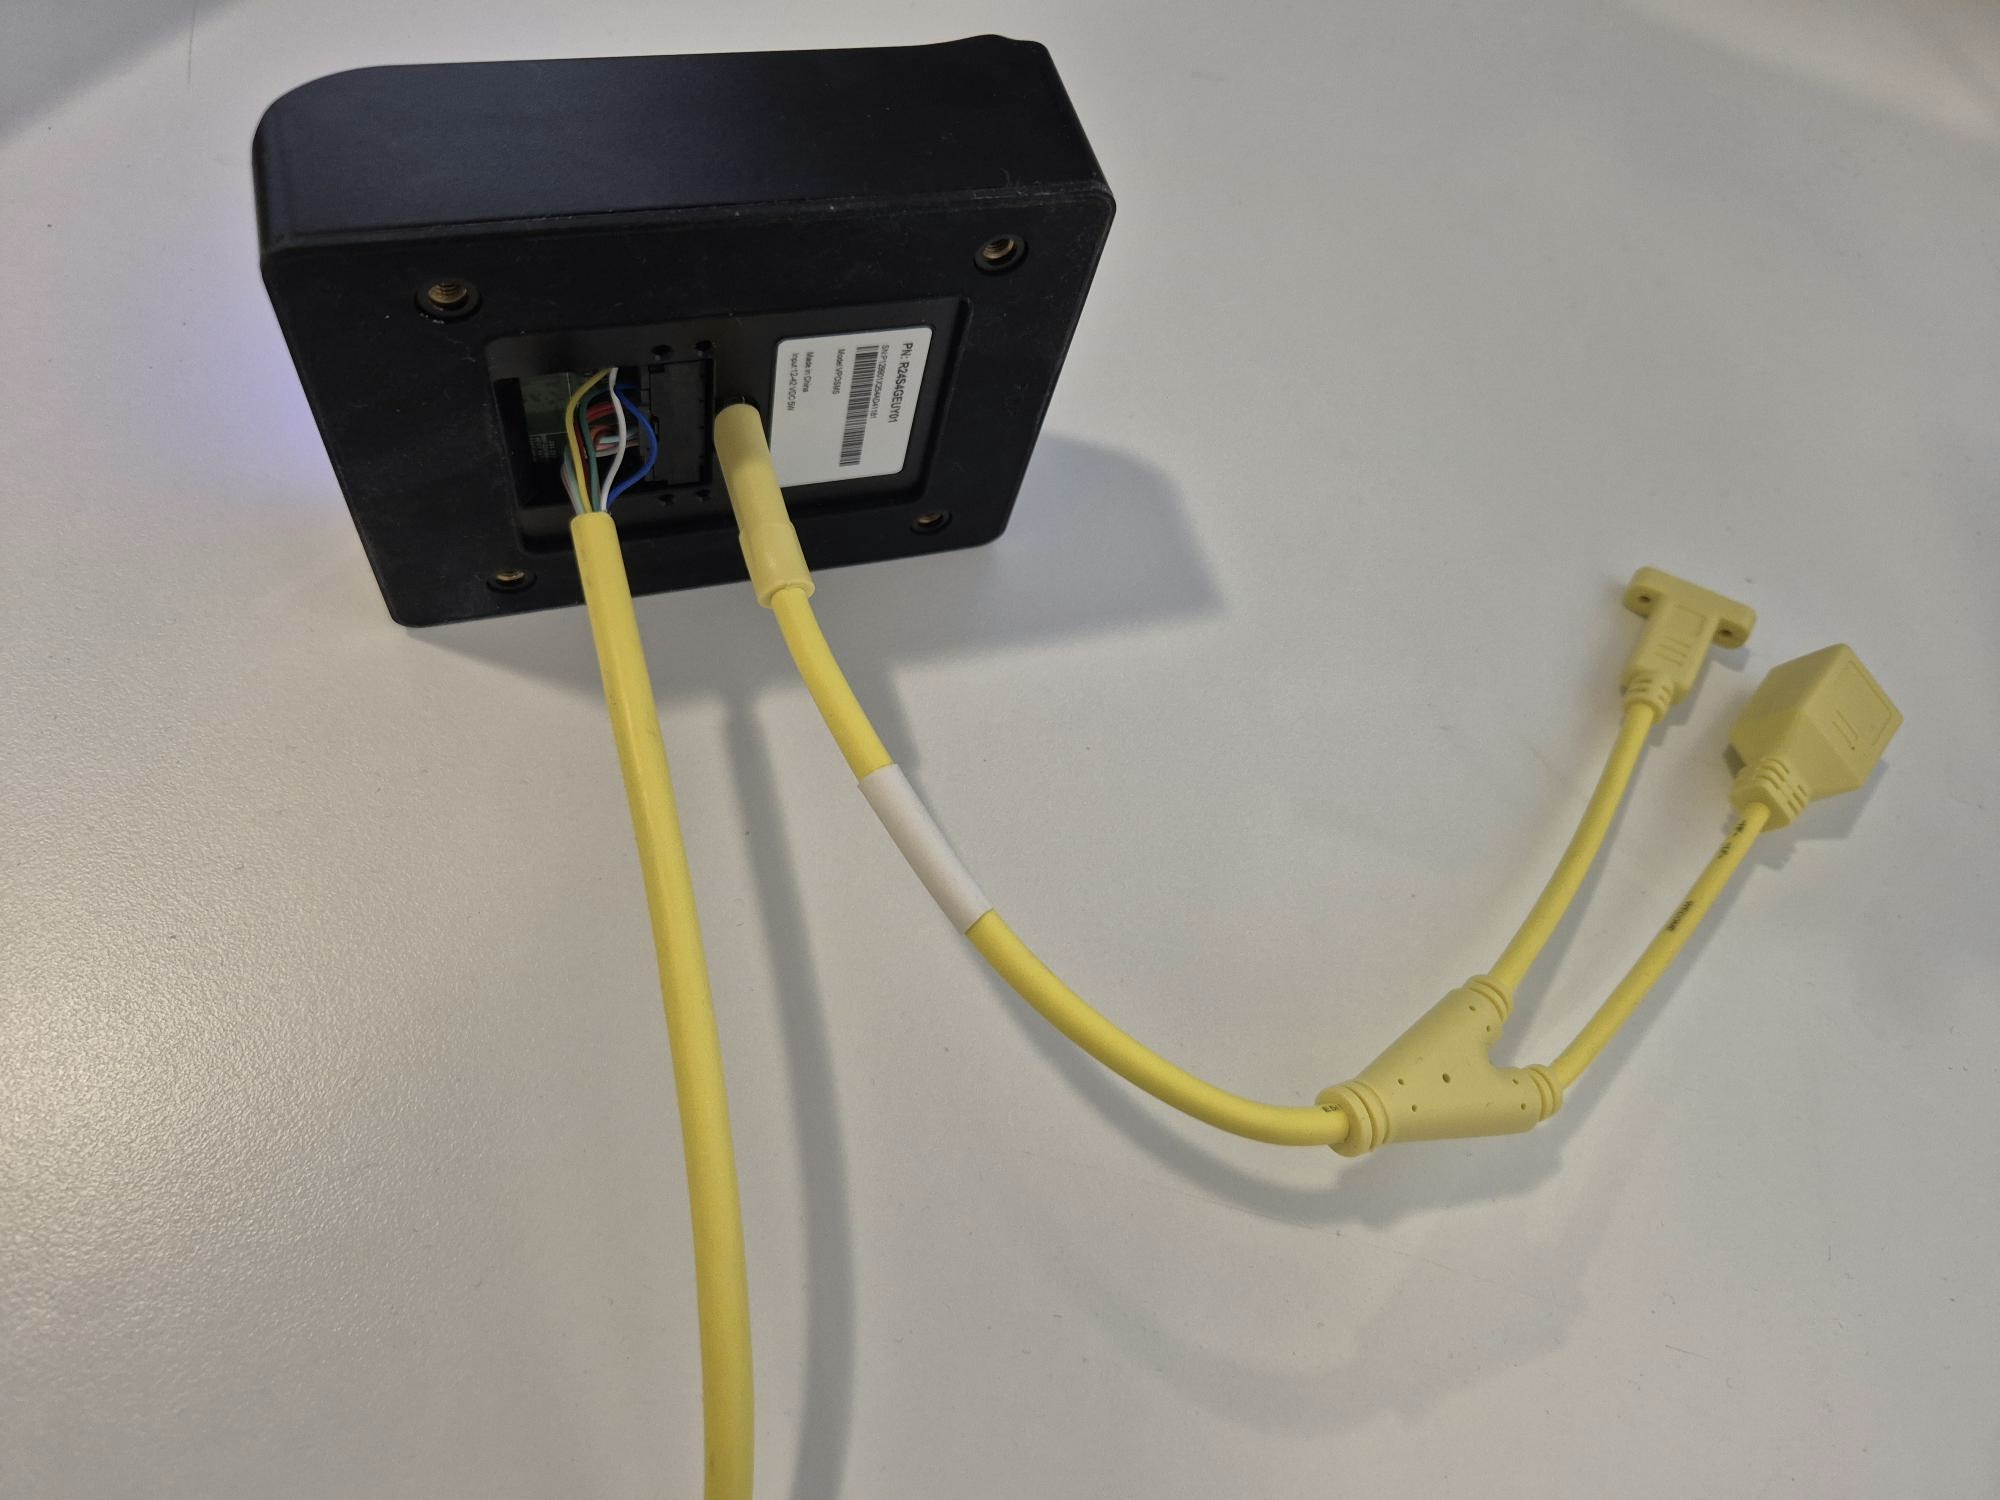
或者您也可以将设备(VPOSM5/VPOSM4S)连接到您的 WIFI 网络。
笔记
VPOS Media 应与外围设备连接到同一本地网络。
3. 对于 VPOSM5:连接天线(如果使用 ETH 则为可选)。
按照 VPOS Media 随附手册的说明,装入天线:
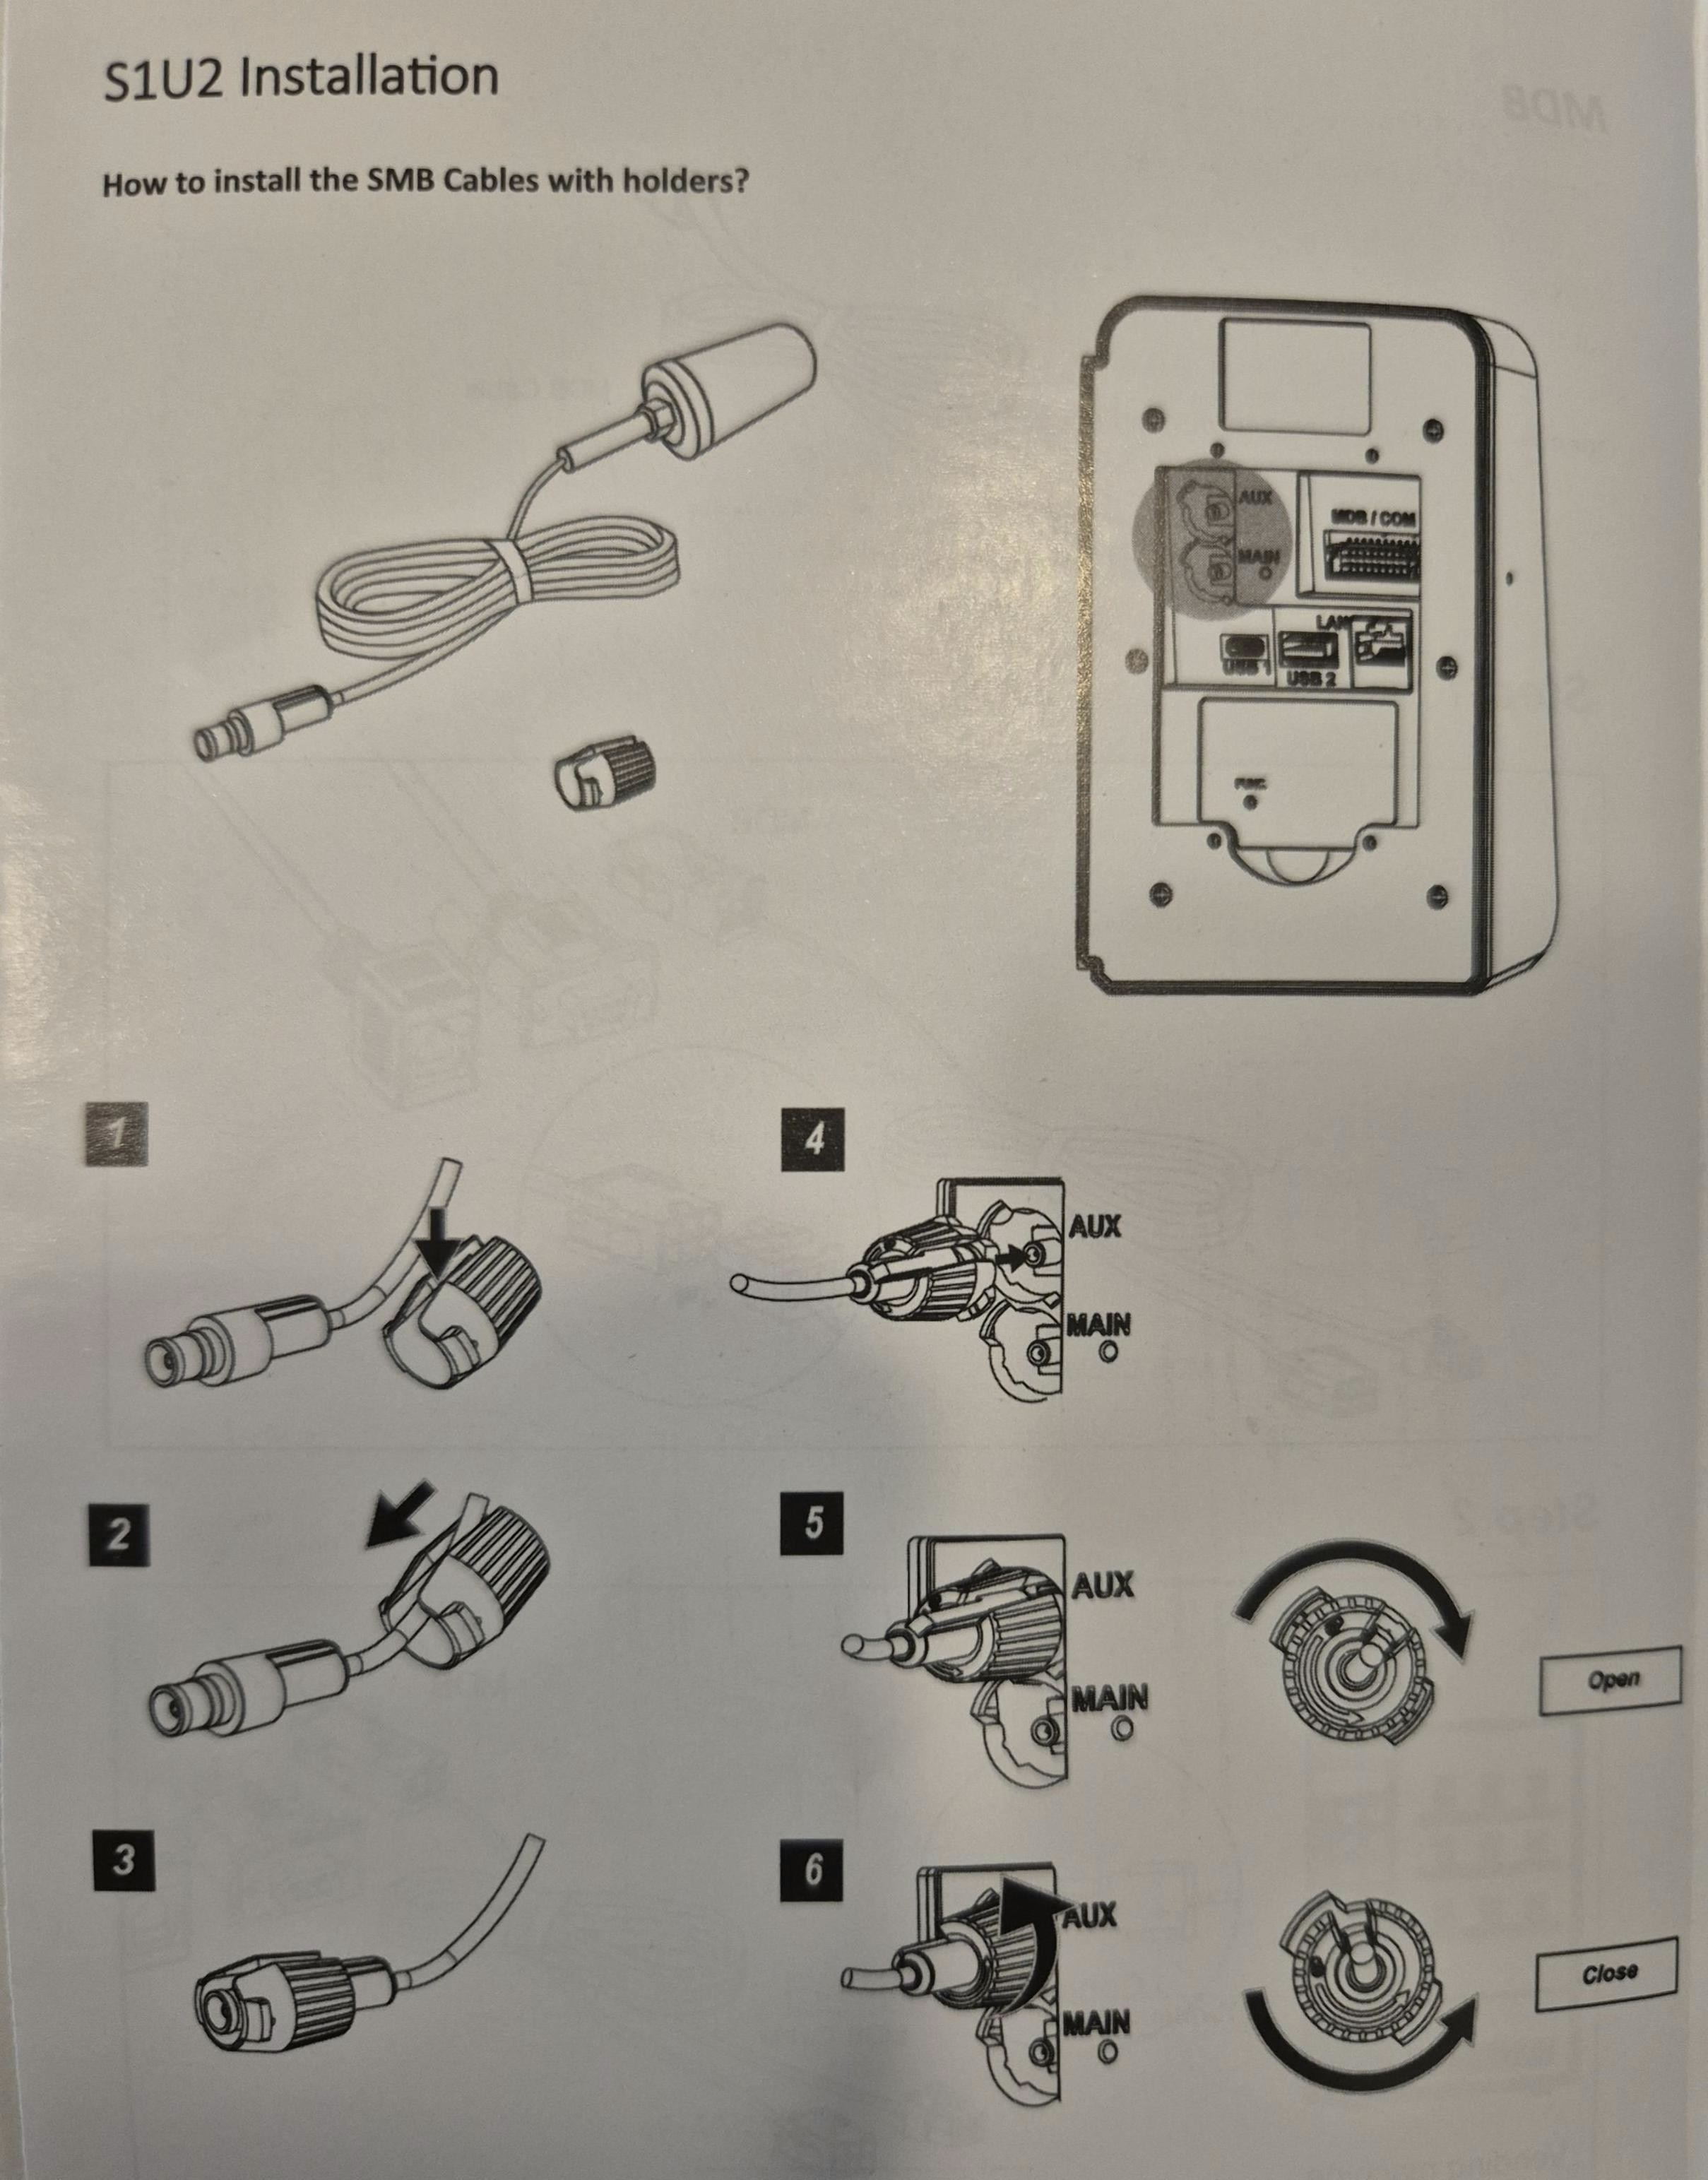 对于 VPOSM4S,天线内置于设备本身中(您看不到它,因为它在设备内部)。
This documentation is built and hosted on [Mintlify](https://mintlify.com), a developer documentation platform.
对于 VPOSM4S,天线内置于设备本身中(您看不到它,因为它在设备内部)。
This documentation is built and hosted on [Mintlify](https://mintlify.com), a developer documentation platform.