

Connecting the device to your POS or simulator
To connect to the device, use the TCP protocol through port 5050. No physical connection to your computer is required. For your device’s Wifi connection setup, see Configuring Wifi (and IP) below. For LAN, see Configuring ETH (and IP).Activating the device
1
Scan the QR code
Scan the QR code displayed on the device’s screen using your phone’s camera.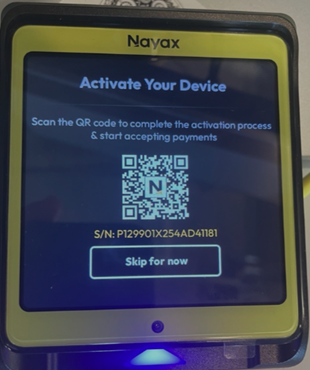
2
Complete the landing page
You’re redirected to a landing page where you enter the required details. After submission, a verification code is sent by email. Enter it on the landing page to complete the device activation.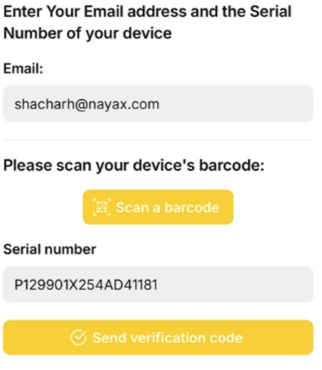
Getting the device’s details (serial number, IP)
1
Set the device to out of service
Disconnect the link to the device and wait 30 seconds.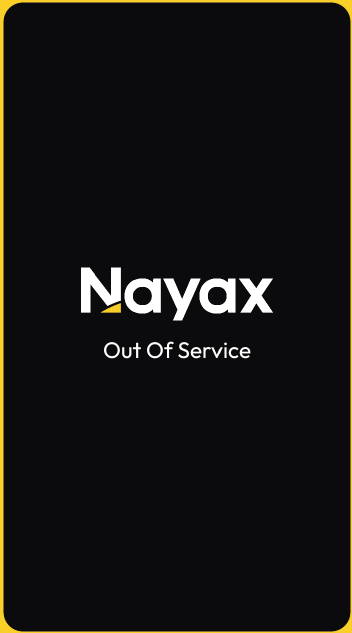
2
Open device info
Click five times on the top-right corner of the screen, then select Device Info.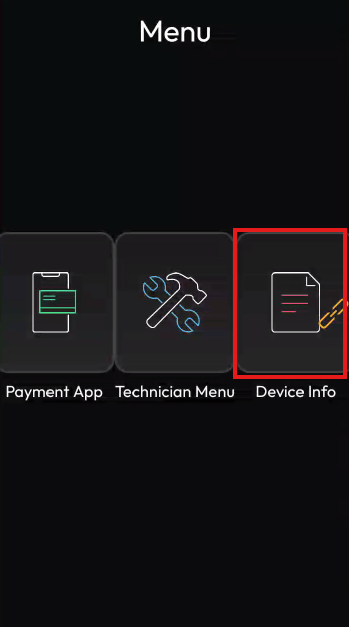
3
Review the device details
Device Info shows the device’s serial number, along with its cellular and Ethernet communication details. In this example, the device has an eSIM and is also connected to Wifi.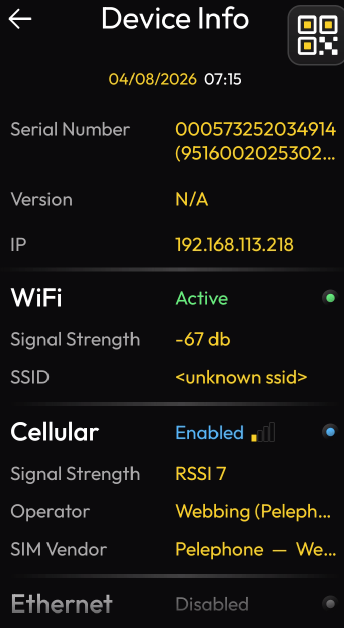
Configuring wifi (and IP)
VPOSM over Marshall supports either DHCP or Static IP, depending on how you want the device to work. DHCP is the default.1
Open the technician menu
Click 5 times on the top-right corner of the screen, then select Technician Menu.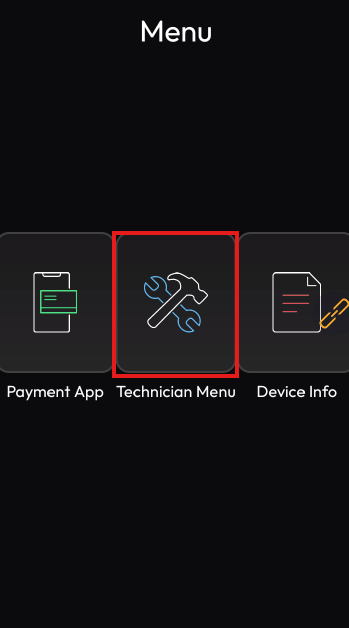
2
Enter the technician code
Enter the code (123123 by default), then scroll down to the Communication section.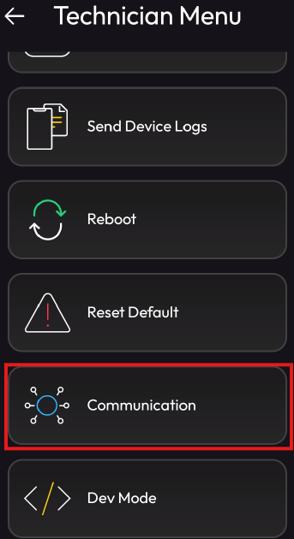
3
Select wifi
Select Wifi, then select the relevant network.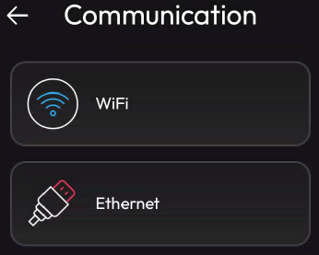
4
Open the network's advanced settings
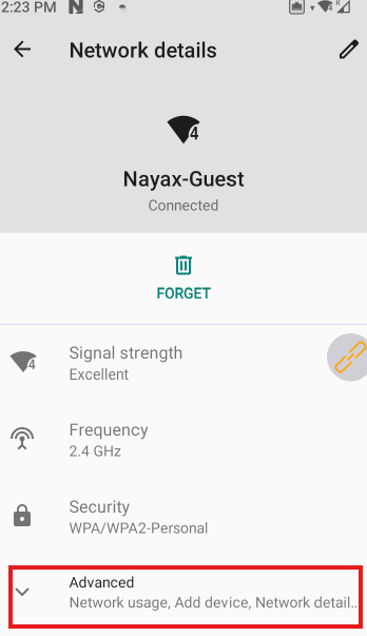
Click the gear icon for the relevant network, then select Advanced.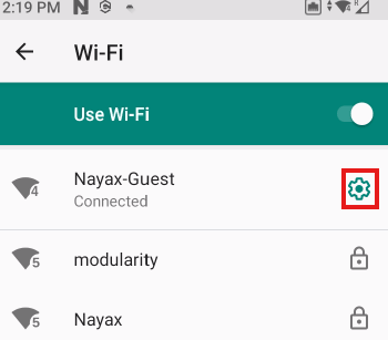
5
Set a static IP
Scroll down to IP Settings, which is set to DHCP by default, and switch it to Static. Fill in the IP details.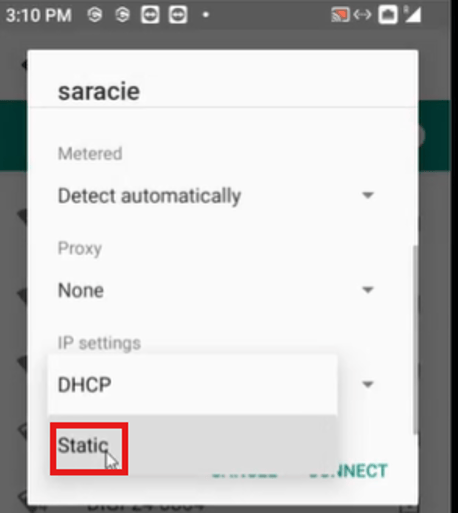
Configuring ETH (and IP)
1
Return to system settings
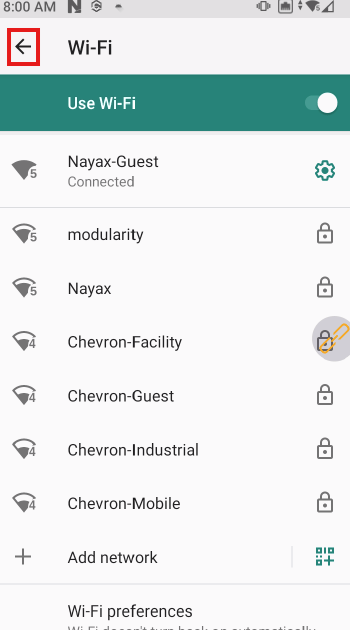
On the Wifi settings screen, tap the back arrow at the top-left to return to the device’s system settings.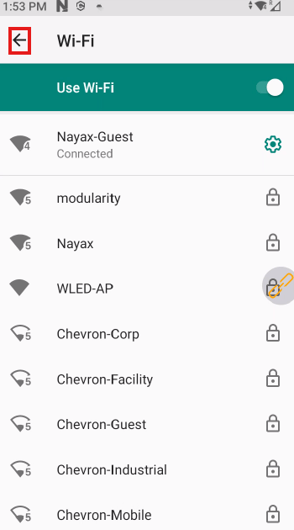
2
Open network & internet
Tap Network & Internet.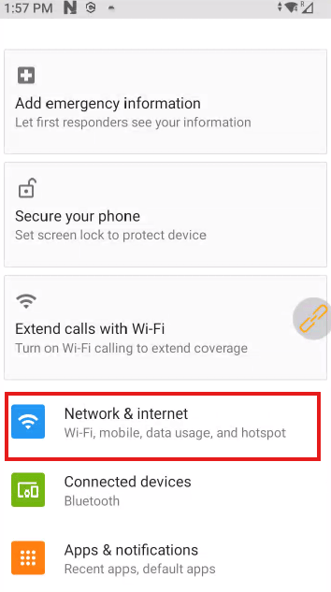
3
Open ethernet settings
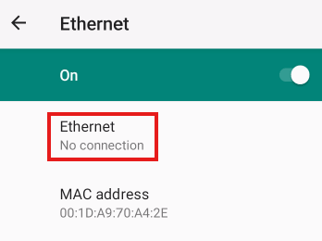
Tap Ethernet, then turn it on using the toggle. Tap the Ethernet row again to open Ethernet Settings.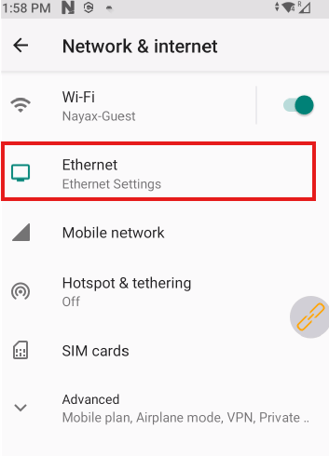
4
Set a static IP
In Ethernet Settings, select Static, then fill in the IP details.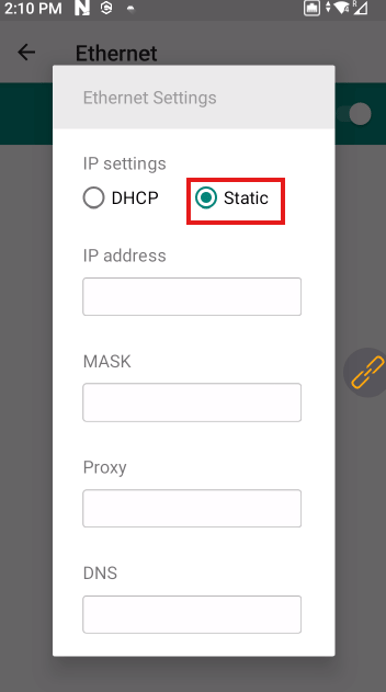
Triggering the apps update process (accessing the CasHub app)
Nayax Fuel initiates firmware updates from a separate platform called CasHub. The update process updates each relevant application individually, rather than as a single package, in two stages: download and update. Once the download finishes, Nayax Fuel’s support team sends the device a request to start the update for the desired applications. You can also trigger the update yourself. Turn on the device and use one of the following options:- Leave the device powered on overnight. It resets automatically at approximately 3-4 AM, at which point the device collects and starts the updates.
- Manually access the CasHub app to trigger the download and installation of the updates.
1
Set the device to out of service
Disconnect the link to the device and wait 30 seconds.
2
Open the technician menu
Click five times on the top-right corner of the screen, then select Technician Menu. Enter the password 123123.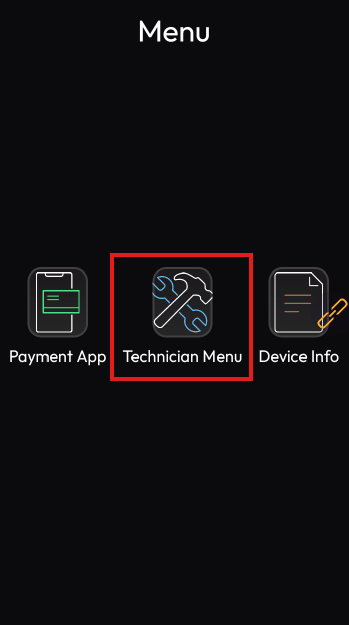
3
Open dev mode
Scroll down to Dev Mode and enter the password 321321.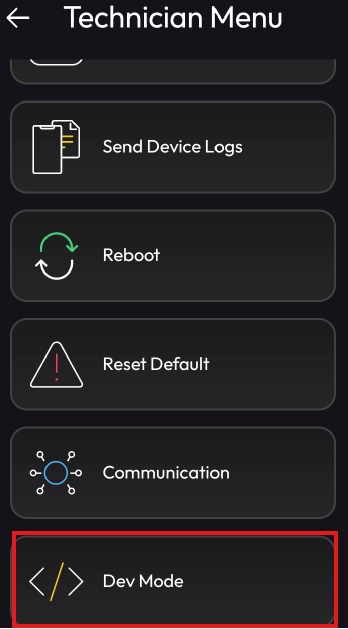
4
Return to Android settings
Select Wifi, then select the back arrow to return to the Android settings.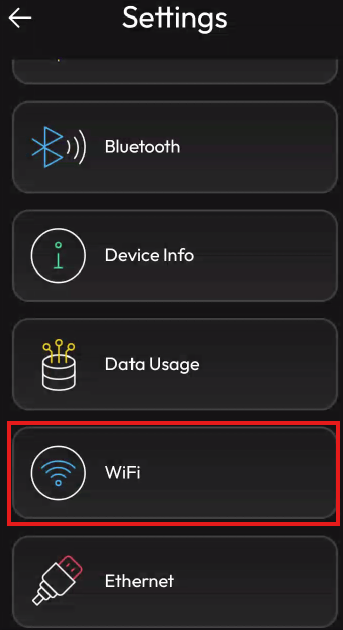
5
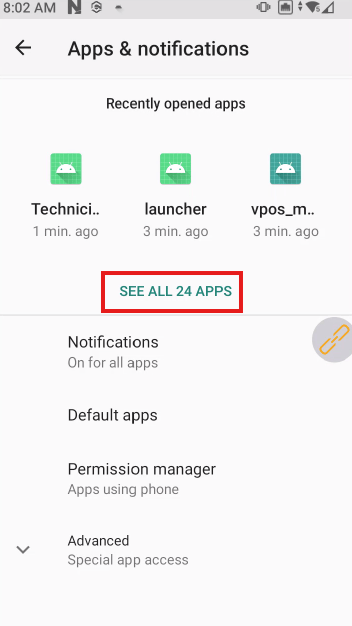
Open apps & notifications
Go to Apps & Notifications, then select See All Apps (in this example, the device has 24 apps).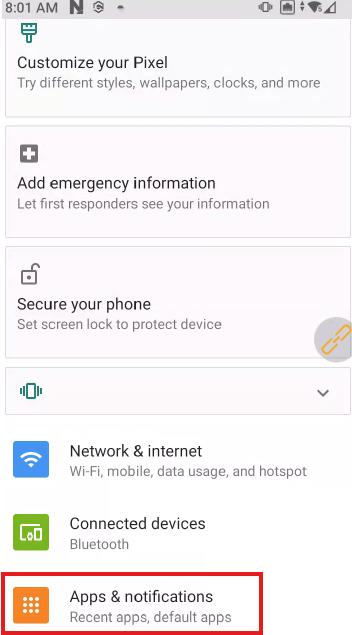
6
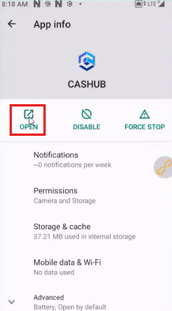
Open the CasHub app
Select the CasHub app and open it.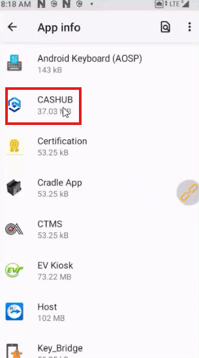
7
Connect and start the update
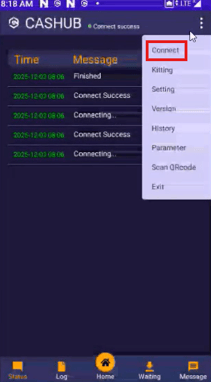
Click Status, then select the three dots in the top-right corner and choose Connect.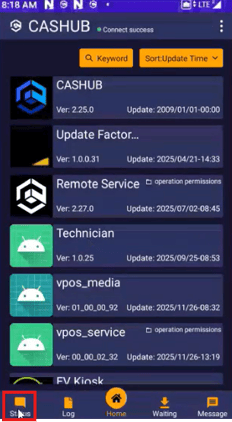
8
Wait for the connection
The screen displays “Connecting…” both at the top and in the table below. If this persists for more than one minute, the process has likely stalled.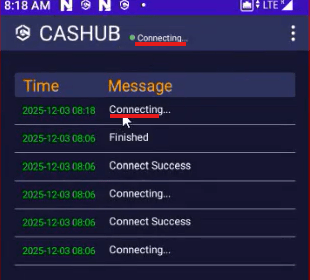
9
Download and install the updates
The download and update of the apps begins.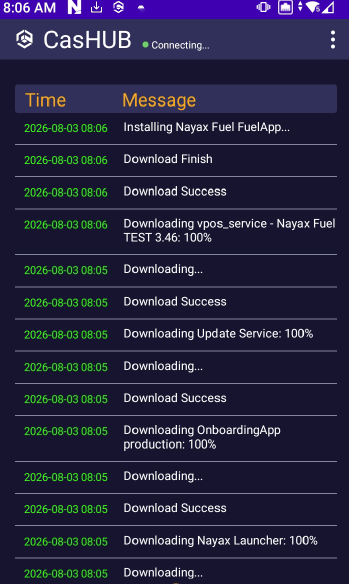
10
Confirm the update finished
Once all apps finish downloading and updating, a “Finished” line appears.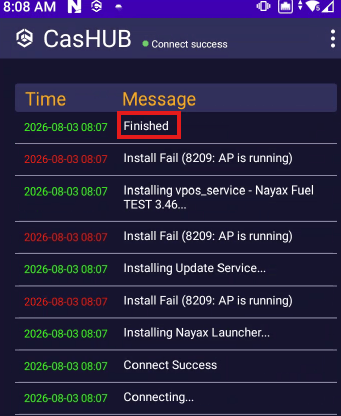
- Nayax Fuel FuelApp
- Nayax Launcher
- Update Service
- VPOS Service
“vpos_media keeps stopping” errorThis error happens because the Vendapp crashes, which isn’t relevant to your setup. This can occur if the Vendapp is set as the default application:
