

Proprietary cards supported
Nayax supports both swipe (Magstripe) and RFID cards. Nayax’s reader operates at 13.56 MHz and supports ISO 14443 Type A and Type B cards (for example, MiFare Classic and MiFare Plus), plus ISO 15693 (for example, HID iClass). The most popular and simplest RFID card supported by Nayax’s card reader is MiFare Classic 1K (or 4K). Magstripe cards are also supported, if they comply with a non-credit-card standard: the card’s data must not contain any ’=’, and its UID must be in the range 4-40. If a magstripe card doesn’t meet these conditions, it may still be possible to support it through an additional integration (Cortina Prepaid).Vend denied: why Nayax doesn’t provide a reason to the peripheral
Nayax does not surface a decline reason to the peripheral, since the device is unattended and shouldn’t display information that could embarrass the consumer.How to locate which virtual COM port matches the physical connection
Go to Device Manager → Ports: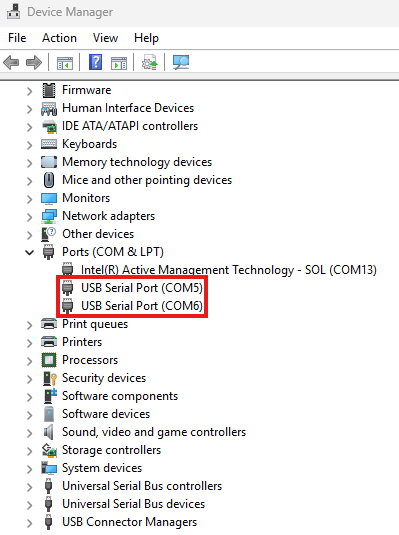
Marshall over ETH
Marshall over ETH is Marshall communication over Ethernet instead of a serial connection. Nayax supports this feature only on VPOSM (VPOS Media), for the Java and C# SDKs (not supported on C SDK, as it only includes Marshall related implementations and not support for a specific hardware). All you’d need to do is set theeth_port’s configuration instead of the pc_port, and ensure that the device and machine are located inside the same network.
Configuring the SDK and Nayax Core
Replace the serial port configuration with an Ethernet port, as shown below:
Using the same cable for Marshall communication and Nayax connectivity
The supported configuration is to communicate via Ethernet with both the (Marshall) peripheral and Nayax’s servers. It’s the router’s role to provide access to the external world in parallel to the peripheral. Having the device communicate with the peripheral via Ethernet and with the servers via eSIM is not currently supported.Enabling alerts
To be able to see the alerts sent from the SDK in the Nayax Core, you should have the following configuration (even if your machine is not an EV charger)
Product map
This feature allows you to manage products via Nayax Core for your peripherals. The only relevance for Marshall is that, if you look in Last Sales/Dynamic Transaction Monitor, you’d see the product name in the transaction details, which appears in the product map for the product code the peripheral has sent. If managing a product map is relevant to you, Nayax University has guides covering it:Example
For example, suppose the peripheral sends a Vend Request for product code 1 at a price of 10.00, and the product map has a row for product code 1:
The product map’s cost is never charged to the consumer; it only supplies the display name.
How to get the eReceipt product name not to be “unknown”?
The product names are taken from our product map, so you can create products in it and name them (to match the product codes you send via the SDK). Keep in mind that Marshall does not use any of the information in the product map, so you can put whatever you want in it. It won’t affect the transaction flow, including prices (the only field relevant to you is the product code name, which appears in Last Sales and the eReceipt file). To add a new product to your device’s product map:- Go to the product map tab.
- Click Map → Add BIN.
- Enter the product code, product group, PA code, and MDB code (this is the one that should match the product code in the SDK).
- Click Save.
Static IP
There’s a requirement to define a static IP for the machine, as when information returns, it would hit a firewall, making the data not know where to be routed.Refund request
A refund occurs when a transaction is completed and settled, yet a consumer would like to get their money back for some reason. Marshall does not have a refund feature, as it does not relate to communication between the customer’s machine and our device, but rather to the payment aspect. You can have a transaction cancelled or a consumer not be charged if you were unable to provide the goods. If there was an issue with dispensing the product, you should respond with “Vend Failure” instead of “Vend Success”. If the transaction was completed successfully (the consumer was charged) and you’d want to get a refund for it you can do it through Nayax Core: go to the Dynamic Transactions Monitor page, select the relevant transaction and press right click on it, select Request refund and confirm. Nayax’s team will be approving the request, and once approved, you should see the funds back in your account within 1-2 days.Unit of measure values
Use the following values when setting a product’s unit of measure:Gtrace retrieval
Gtrace is a log that provides general information about the device’s behavior, unrelated to communication with your machine. It would not show up in the SDK’s commands and logs, but on the Gtrace, another type of log file, but this one is generated by Nayax’s reader and is sent to Nayax Core. Should it be relevant to you, you can retrieve a Gtrace the following way (note that to retrieve it, your device should be on, as you can imagine): Once you’ve selected your desired machine, choose Actions → Request Gtrace: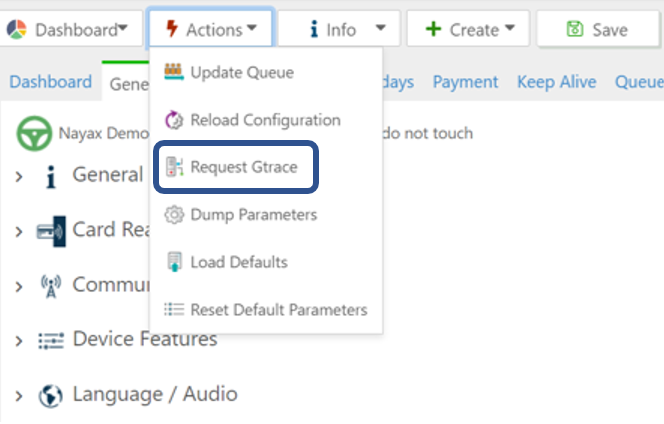
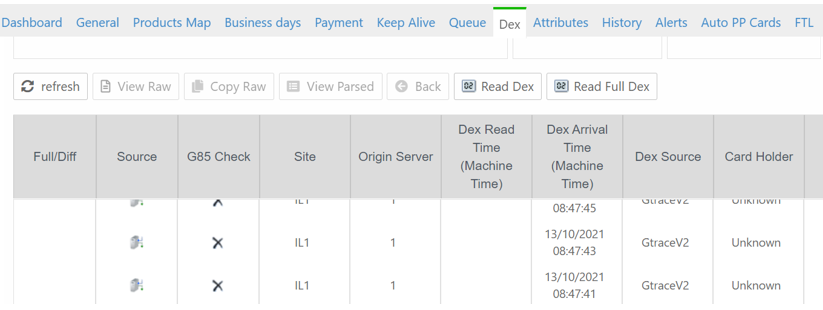
Device must be online to collect the Gtrace.
Last alerts retrieval
Last Alerts is a log that appears in Nayax Core under your relevant device’s virtual machine. The log provides information on alerts sent between the device and our servers. To retrieve it, go to the relevant virtual machine, then click Info → Last Alerts: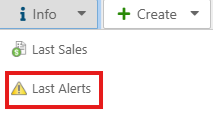
Cable SKUs
The following SKUs cover the Marshall cables and adaptors for each device:Firmware version update process
VPOST/Onyx
Nayax Core initiates the firmware update. The firmware update is made out of two parts: the MAIN update and the POS update. For the MAIN update, you’d see “gloader” at the top of the screen, along with a percentage next to it. Once the MAIN update completes, the device resets itself and starts downloading and updating the POS. After completion, the VPOST powers up and enters idle mode. This whole process usually takes 30-60 minutes (longer if using ETH).VPOSM 4S
Similar to VPOST and Onyx, Nayax Core initiates the firmware updates, but unlike those devices, it is made out of only one part. The download process runs in the background, so consumers can continue using the device during it. Once the download completes, the device will automatically start the installation and display a matching installation screen showing the current installation progress.VPOSM5
Unlike VPOST/Onyx/VPOSM 4S, a separate site called CasHub initiates the firmware update. The firmware update process is done by having each of the relevant apps updated manually (not as one package). The firmware update for each of the apps is made out of two separate parts: the download and the update. Once the download process has been completed, your local support would need to send the device a request to initiate the update process for the desired apps.Timeout for getting approval of the transaction from the acquirer
The “Authorizing, Please wait” message shows until either a response is received from the acquirer or a timeout is reached. Usually, if the VPOST can communicate with our servers, the whole process of sending the authorization request and getting a response back takes a few seconds, usually up to 5; our servers do not have issues getting a response from the acquirer. If there are any GSM, VPN, MQTT (Message Queuing Telemetry Transport), or ETH communication issues between the VPOST and our servers, the request can take longer to arrive, or the response can take longer to come back. The “MDB RX Timeout” parameter controls this timeout, and its default value is 60 seconds: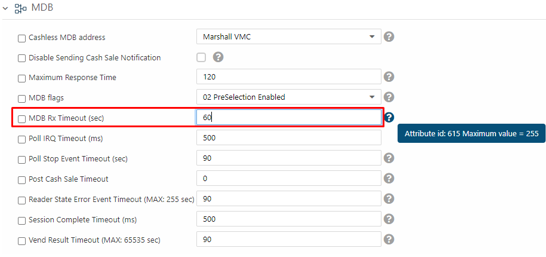
“Trick” of starting a transaction at one location and finishing it at another
The following example uses cart rental:- Have a transaction started from Nayax’s device at the 1st location (take a cart from there)
- Have the consumer use the cart
- Have the consumer return the cart to any rail he desired (not necessarily the 1st location. Let’s say it’s a 2nd location). At this stage Nayax’s device at the 2nd location would recognize the cart, will send its ID to a main server which will make a match between the cart ID and the Nayax device in which the transaction started with, and close the transaction over there. But as you can understand, in such a case, there is a need for server management on your side.
- A server to manage which sessions are opened at which location
- A way to differentiate between different cards
- Each rail can have up to 60 carts available for rent at a time (should there be more, the consumer won’t be able to rent those)
Dynamic QR channel URL appearing in the SDK (brand selection screen)
To have the brand selection screen start with, the device must be configured to Always Idle (since regular Preselection shows animations after a product is selected and cannot display brands). After you select a product, the brand/channel and the QR appear on the VPOST’s screen, and also in the SDK’s log. The string appears in Hexa, so there’s a need to convert it to ASCII in order to get the URL. For example, use a hex-to-ASCII converter.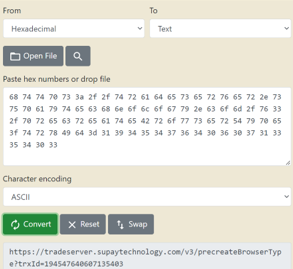
CPU requirements
No special requirements for any of the SDKs.Java and C# SDKs
The SDK has such low CPU and memory requirements that if your machine can run a JVM, it can run the SDK. Nayax estimates its memory usage at around 50KB of RAM and almost zero CPU time. (This is based on about 100 lines of code executed every 5ms, and not much more than that on every packet when serial data is received.)C SDK
Nayax estimates the C SDK’s memory usage at around 1KB of RAM, with a timer tick of around 100 lines of code executed every 5ms (actual machine code depends on compiler and platform). Nayax has tested it on an Atmel AVR with 2KB of RAM and an 8MHz controller, with plenty of resources left for the actual application.Updating an existing implementation’s SDK with a newer SDK version
Java
You’d replace the .JAR file (located inside the SDK’s directory, inside the “libs” folder)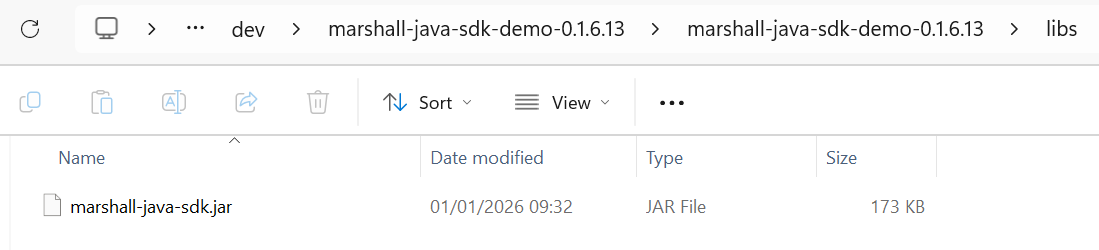
C#
You’d replace the .DLL file (located inside the SDK’s directory)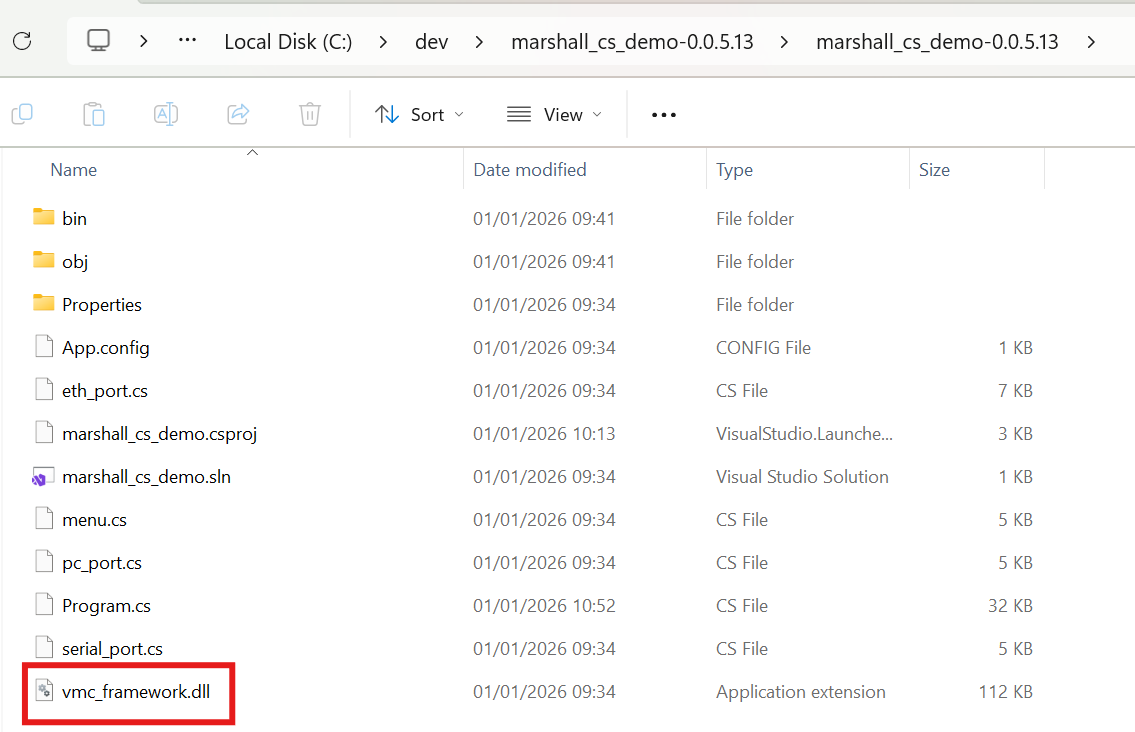
C
You’d overwrite the previous SDK with the new one and recompile your implementationAndroid
If you’re working with Android, you won’t use the serial port number. If your board has a serial port, you can use the regular low-level implementation from the Java SDK. Most Android boards don’t have an onboard serial port; in that case, Nayax provides an Android low-level file for you to use in its place. Use the Java SDK as is, with one change: replace the low-level serial port implementation with the code from the demo callednayax-android-marshall-demo_0_1_6_02.
The part in the SDK which relates to the serial port is:
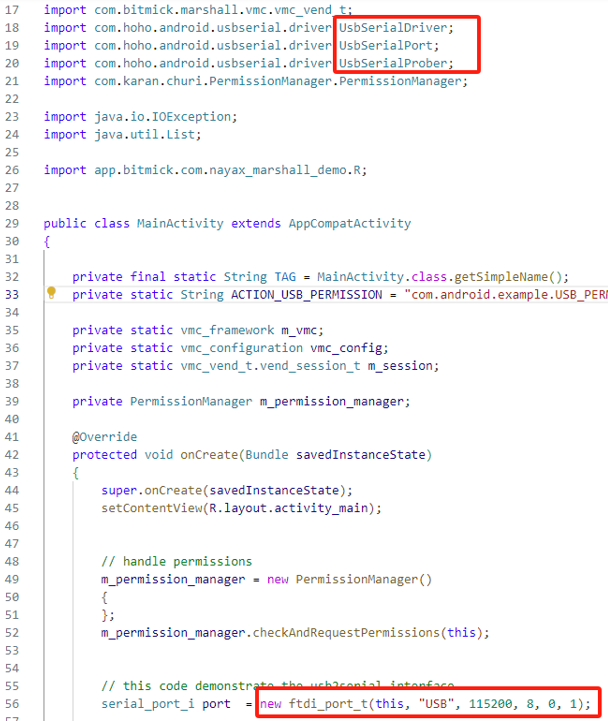
When working with the lowlevel serial for Android, you won’t be able to use the demo app, but you can use it as a reference for how to initiate transactions.
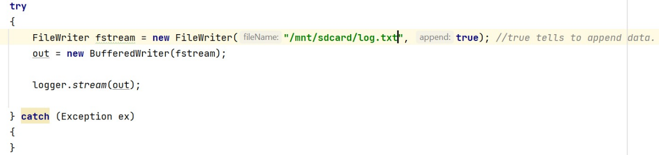
BufferedWriter type. The following example shows how to write to your SD card:
In case of UART located at /dev/tty
Android can’t access/dev/tty..., meaning you need the vendor serial port library, and implement serial_port_i around it.